 Solar Roof retrofit - Electrickery
There are 2 elements to retrofitting a solar roof - (1) Fitting the roof panel and (2) hooking up the wiring.
The wiring is conceptually simple.
A normal D2 without solar has a simple +12 constant feed through a 40Amp fuse to the blower motor.
With Solar, there is a relay just before the fuse that switches the feed between +12v or the solar panel depending on the current state of the climate module.
The critical part of this job is the have the correct wiring loom, or at lest remove it from a donor car in a useable fashion. If in doubt contact a8parts for one, although its likely only available as part of whole retrofit kit.
I'll describe in detail how to prepare and fit a loom as you would receive from a8parts.
Firstly, lets examine the retrofit loom:

And a close up on the relay holder:
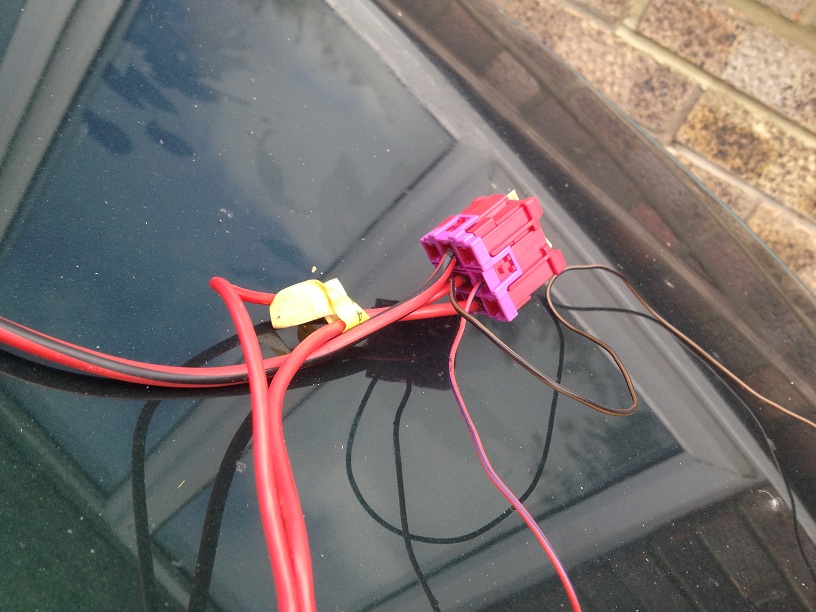
and from another angle:

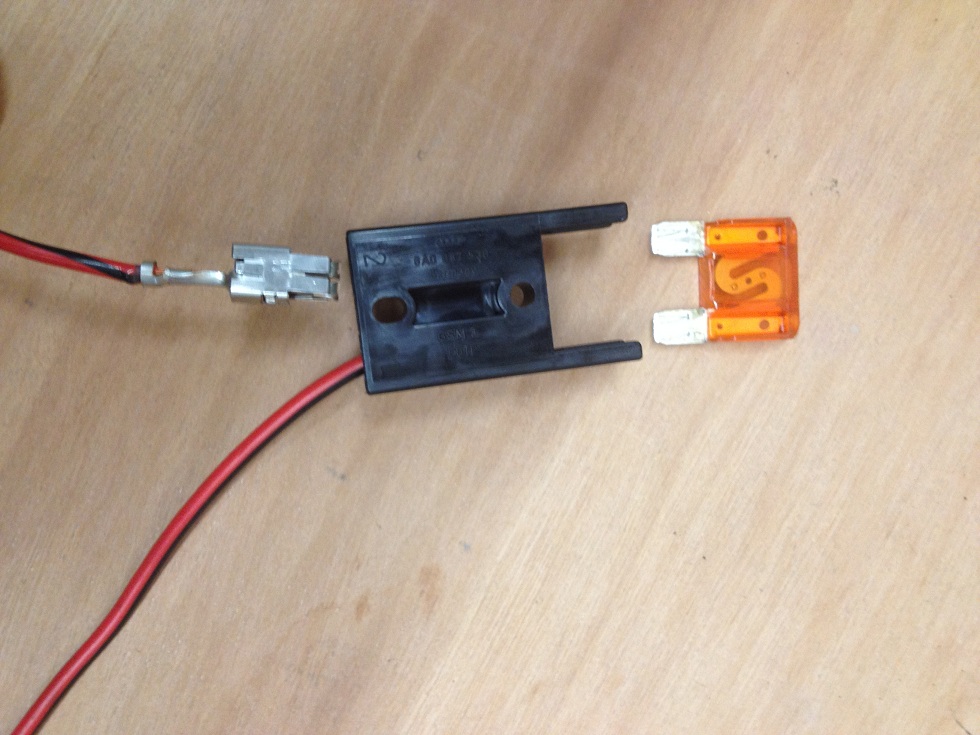
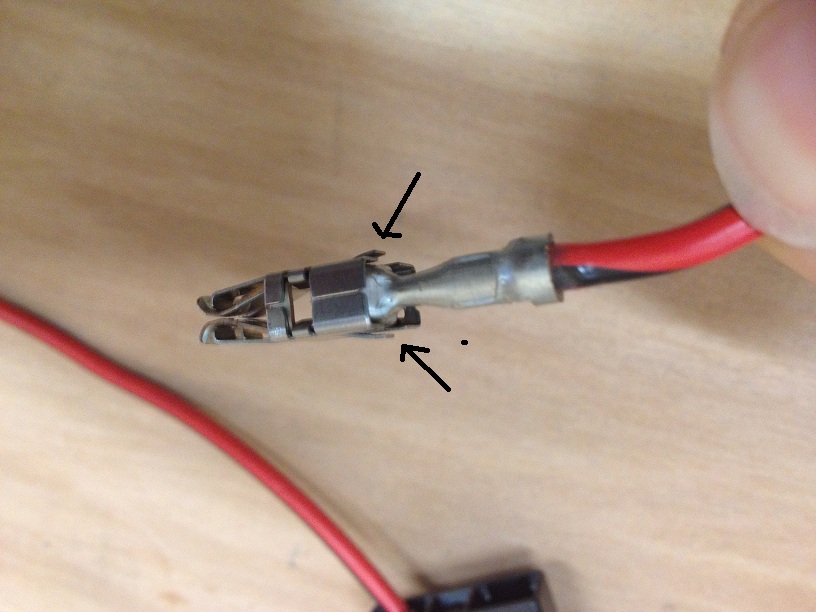
Ok, now I'm a stickler for OEM, and that includes wiring. You can join the wiring, but at 40amps there some beefy connections. Instead, I prefer to remove the connecitons properly and reuse them. The place to perform this is at the blower fuse holder - Leave 1 connection in place on the car, and slot the rest of the retrofit loom into the other connector.
The big fuse block can have its connectors removed with some careful manipulation:
You need 2 flat blade screwdrivers to insert into the tabs below so that the connector can be pulled out gentle:
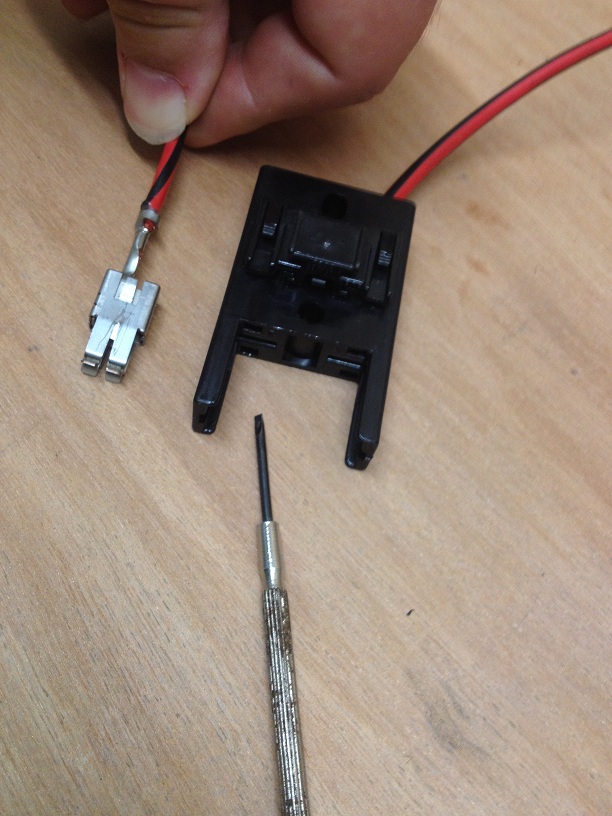
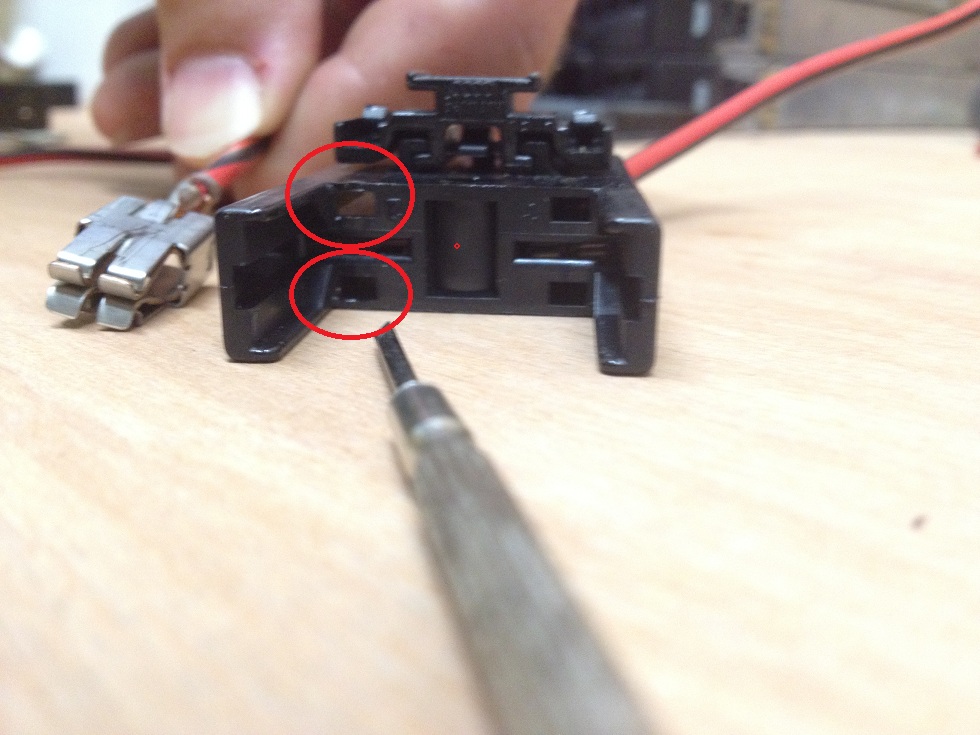
These are the tabs you are aiming to press down using the flatblade. Once pressed down, the connector will pull out from the casing. Leave the fuse holder in the car, remove completely the small length of loom that runs down the 10mm nut at the bottom of the fuse box.
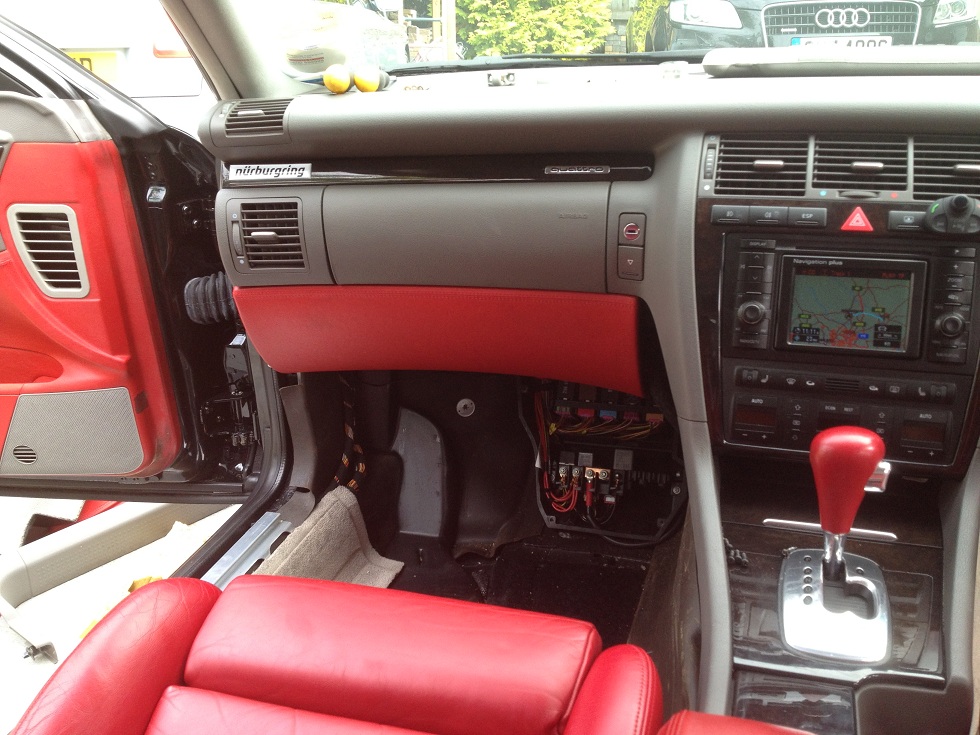
Footwell prepped, stripped back and transmission tunnel covers removed:

You'll need to strip back the roof trims between the middle sunroof controls and the A pillar so that you can run the solar panel connection up the A pillar and into the void above the sunroof controls. This is where the Panel will connect to the retrofit loom.

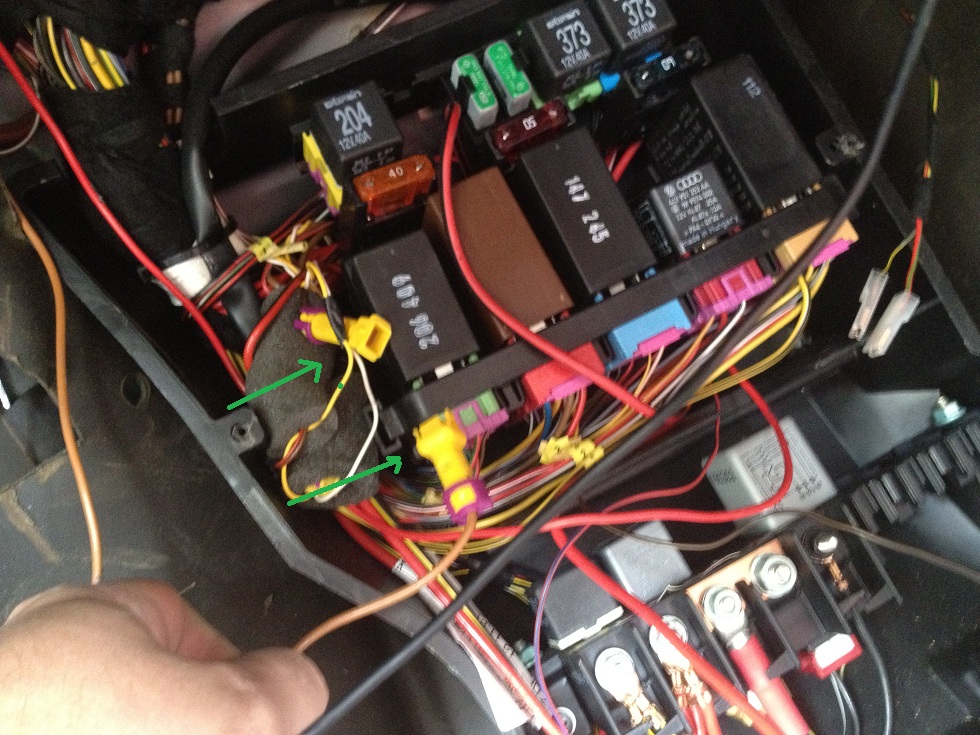
You'll end up with a bundle of cable in the footwell we'll need to deal with. The main relay panel pulls out with a little care revealing the space where we can install the solar relay

And the relay holder pushed into place. The metal bar is from a pre-wired pre 1997 car, and the solar wiring was present even though there is no solar panel so this bar acts as a permanent bypass to connect the blowers to +12.

Replaced with a relay:

and pushed back into place, and the connector pushed into the 40 amp fuse holder, and it popped back into place

And connect these 2 earth connections together, one from the solar panel, and one on the car - Oddley, this connection is on every D2 - They all seem to be prewired with it.
Then onto the climate module. Remove it completely and find the conenctor block A - Note it is not the connector to the far edge of unit, it is one of the 2 connectors next to an edge connector. Look very closely at the unit and you will see the letters.

This is the one we need to connect to the relay back in the footwell. Pin 14 is memory serves me correctly. The wire presses in, then metal clips wrap around to hold it in securely.
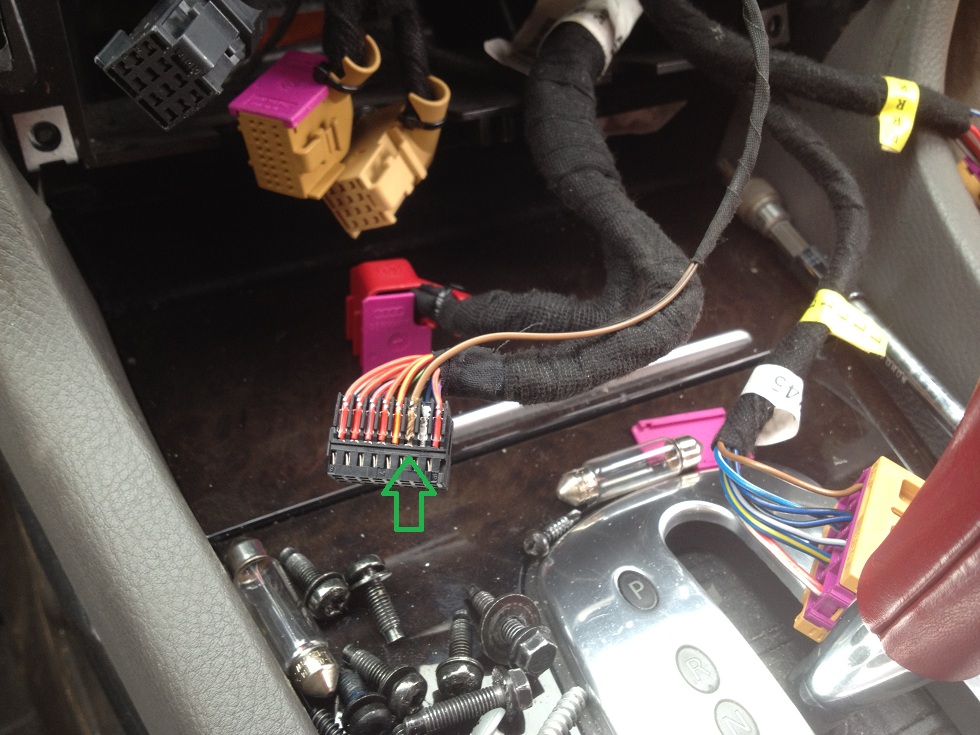
All taped up nicely and ready to plug back in:

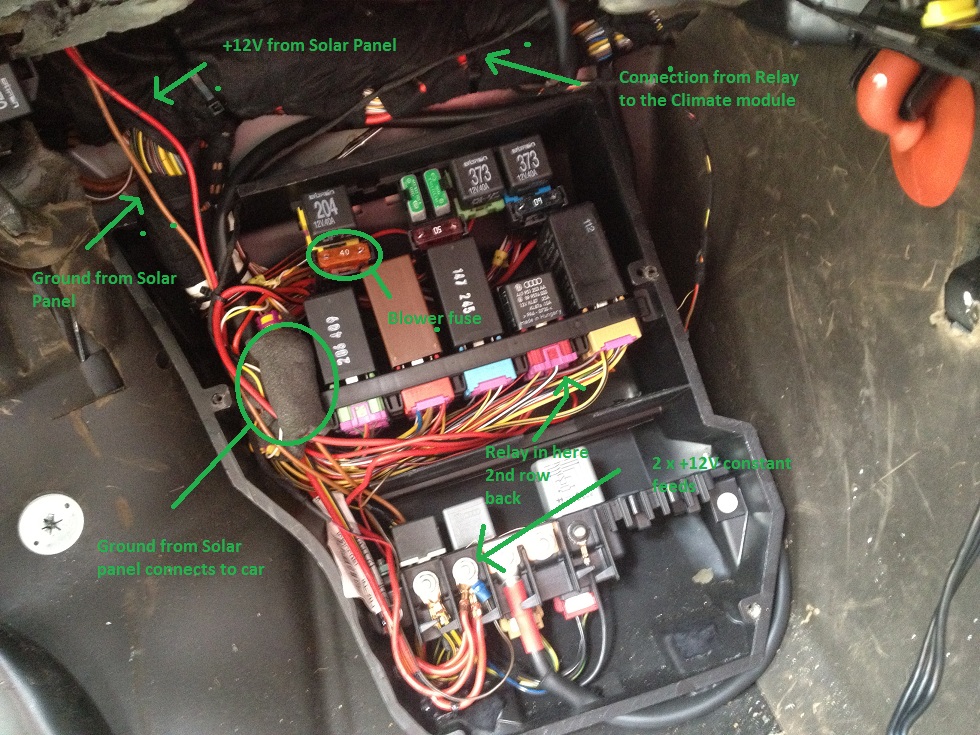
And pop the climate back in, then we're pretty much done. Make sure the 2 x 12V constant feeds are connected to the 10mm spade at the bottom of the footwell (where the original blower feed came from) and all should be good. Heres a final reference:
Sorry its a bit rushed... i'm on a laptop and battery is going flat lol.
Any questions, ask 
__________________
For parts enquiries and Forum User Administration please contact customer services directly, not me  - enquiry@a8parts.co.uk, www.a8parts.co.uk, or call 01642 783537
The Daily Town Car - 2023 Tesla Model Y Performance. Black with Black. Giant ipad screen, huge sunroof, 4 wheel drive, Tow bar, lots of ooomph and made in China, so actually built properly unlike the Californian ones.
The Family Wagon - 2018 Tesla Model X. Black, 7 Seats, Towbar, Homelink, Enhanced Auto pilot with Summon and self park, Heated front seats, CCS Charger upgrade, MCU2 Upgrade, Falconwing Doors, Self opening / closing doors, Netflix, Spotify, toys, Air suspension, alcantara roof + lots of other stuff......
The 17 year old Driver Wagon 2015 Skoda Citigo Monte Carlo. Alloys, Power steering, Aircon, Leccy windows, Sat Nav, bluetooth, central locking, cup holders, 59 whole bhp. Million times better than my first car. Well jealous.....
The First 20 Audis:
2001 D2 4.2 QS Silver, 1997 D2 S8 Silver, 1999 D2 4.2 Silver, 2002 D2 S8 Dolphin Grey,
2003 C5 RS6 Blue, 1998 D2 S8 Black, 2000 D2 4.2 QS/S8 Ming Blue, 2003 D3 4.2 Ming Blue,
2005 B7 S4 Blue, 2006 D3 3.0 Tdi Black, 1999 D2 4.2 Silver, 2003 D3 4.2 LPG Crystal Blue,
2000 D2 S8 Silver, 2007 3.0 Tdi Q7 Black, 2009 B8 S4 Black, 1998 D2 S8 Agate Grey,
2006 D3 4.2 Tdi Blue, 2006 D3 S8, 2007 Q7 3.0 Tdi, 2006 C6 S6,
The Second 20 Audis:
2011 A7 Sline, 2001 A2 1.4 Tdi Black, 2002 A2 1.4 Tdi Silver, 2006 A8 4.2 Tdi Blue,
2007 4.2 Tdi Q7, 2006 S4 Cab Silver, 2010 RS6 Saloon Black  , 2007 TT Roadster,
2010 A8 D4 4.2 Silver, 2006 C6 A6 2.7 Tdi Quattro, 2000 D2 4.2 QS/S8 Ming Blue (again), 2008 Q7 4.2 Black,
2009 C6 RS6 Saloon Daytona Grey, 2001 Fully Loaded A2 Tdi, 2006 Avant S6 Black, 2007 VW Caravelle Exec Black (almost an Audi)
2009 TT Roadster Daytona, 2015 Q7 4.2 tdi lava grey, 2002 GmbH D2 demonstrator, 2006 D3 A8 LWB 4.2 Tdi Black
Most Recent Audis:
2001 A2 1.4 Tdi Black, 2007 4.2 FSi Q7 ABT Blue, 2016 S5 Coupe Launch model, 2004 S4 B6 Cabriolet, 2016 Q7 Sline White, 2006 Q7 4.2 FSi Black, 2012 Q7 Sline+ 4.2Tdi White, 2008 Blue Audi S8
Everything Else
1989 Subaru Justy, 1986 Vauxhall Cartlton 2.0 GL, 1985 Vauxhall Carlton 2.2 CDi, 1987 Ford Sierra XR4x4, 1983 Vauxhall Senator, 1985 Vauxhall Senator 3.0i, 1997 Polo Saloon, 1997 Peugeot 306 1.9 TDi, Ford Sierra Sapphire 2000E, 1990 Subaru Justy, 2000 Subaru Impreza, 2000 Subaru Impreza RB5, 1993 Range Rover LSE, 2005 VW Bora, 2003 Skoda Superb, 2003 VW Passat V6 4 Motion, 1996 Peugeot 106, 2000 Range Rover 4.0, 2019 Tesla Model 3 Performance

|