
|
|
|||||||
| D2 - Engine Bay Everything under the bonnet |
 |
|
|
Thread Tools | Display Modes |
|
#31
 31st January 2017, 01:59 PM
|
||||
|
||||
|
Quote:

__________________
I'd rather drive on left 
|
|
#32
31st January 2017, 06:50 PM
|
||||
|
||||
|
This is brilliant - all these little touches really bring the bay together. I've always hated the vacant space by the power steering reservoir and was toying with the idea of getting the small cover from the 2.8 model, but this looks far, far better and I will 100% be going for this
 I have a couple of questions please. 1. Similar to you, I have a matching coolant/oil caps except mine are Porsche but the coolant cap did not fit just like your R8 one didn't. I was working on a similar mod to yours but using an epoxy but I wasn't keen on the gap between the two caps and gave up but you've given me fresh hope . Can I get that bonding stuff over here?2. If yes, what prep work did you do beforehand? Any rubbing down, any cleaning etc? picture of mine for reference 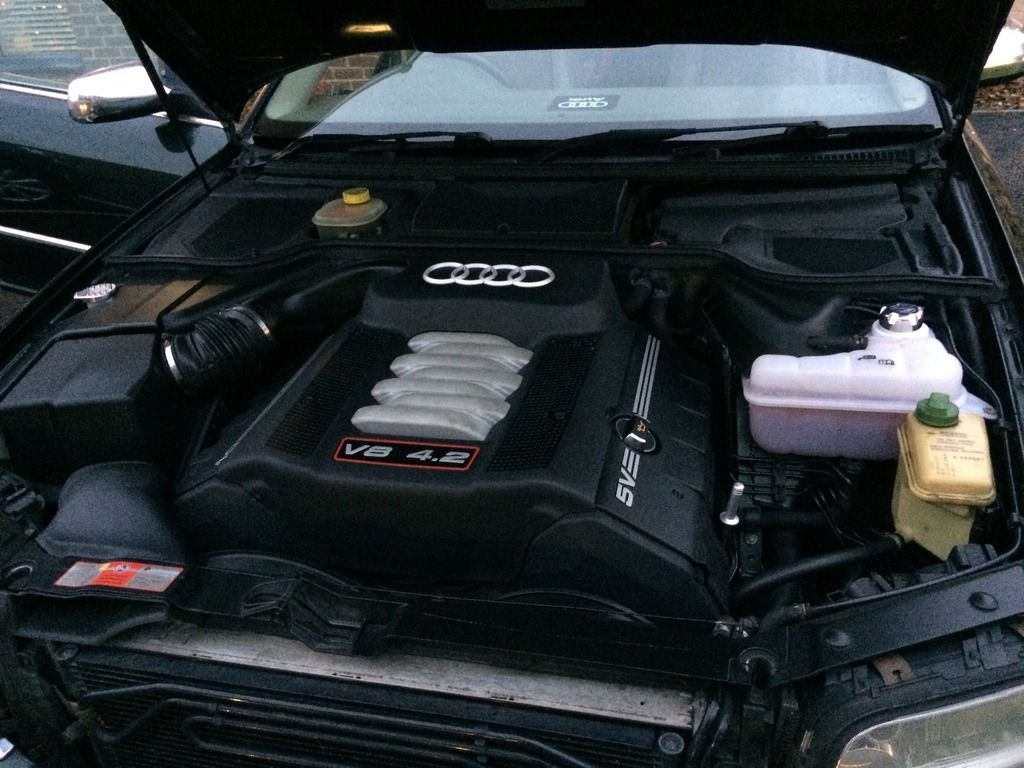 Thanks Rich
__________________
2002 S8 - Irish Green Pearl. Cat N (saved by the D2 Doctor  ) )1988 E30 Coupe - Royalblau Metallic 2003 S4 Avant - Light Silver Mettalic 2016 S5 Coupe Black Edition - Ibis White 
|
|
#33
31st January 2017, 07:56 PM
|
||||
|
||||
|
Hi Rich,
Quote:
3. Options for polyurethane adhesives (I used Option A) A. Petec 94730 Car Body Sealant Adhesive Putty Black B. Sikaflex by Sika C. Sodudaflex by Soudal I ordered the Option A from Germany: http://www.ebay.co.uk/itm/111646731729 but I'm sure Sikaflex is equally good and can be purchased from any Screwfix store. The beauty of one component polyurethane adhesive is that it will maintain elasticity for life, which is great for temperature fluctuations in that area. In my opinion, the two component epoxy can crack with time as it is so hard. I preferred Option A also because it is specifically designed for Automotive industry, where as Sikaflex and Soudaflex are more general purpose. Didn't want to risk expensive parts.
__________________
I'd rather drive on left Last edited by notorious; 31st January 2017 at 08:28 PM.
|
|
#34
31st January 2017, 08:16 PM
|
||||
|
||||
|
Quote:
Before gluing I have rubbed inner surface of R8 cap with sandpaper for better adhesion and then wiped with methylated spirit to completely degrease it. This bit of preparation was over the top I must admit, but I just enjoyed taking my time. I also removed about 0.5mm of plastic from the top of the newly purchased blue D2 cap where all the letterings are. Basically flattened the top. Done it for two reasons: 1. to make it sit 100% horisontal within the R8 cap during gluing process. 2. To save 0.5mm of height since I had a theory that the bonnet will sit too close to the top of R8 cap, which didn't prove to be the case. The blue cap was also roughened a bit with sandpaper and wiped with methylated spirit directly before gluing. The *important* preparation step is to mark where exactly the D2 cap will sit/point in fully tightened position in order to glue the R8 cap on top of it so it will be aligned the way you want it. For example, on my car in fully tightened position the R8 cap's handle sits fully horizontal and the warning triangle on it isn't upside down. There is only one gluing position that allows for this. It should be properly calculated. Additional allowance should be given for the new D2 cap gasket to settle with time as well since it'll become a bit squashed in the future, so the cap should be rotated further to achieve full tightness. Allow 48 hours for adhesive to settle before tightening the cap. Hope it helps?
__________________
I'd rather drive on left Last edited by notorious; 29th March 2017 at 02:46 PM.
|
|
#35
31st January 2017, 08:39 PM
|
||||
|
||||
|
Sorry - I must have skipped past the part where you list the product in my moment of excitement
Thank you for a very informative procedure kind sir This is exactly what I thought you would say....my main concern as you state would be lining up the caps perfectly so that it sits correctly!
__________________
2002 S8 - Irish Green Pearl. Cat N (saved by the D2 Doctor )1988 E30 Coupe - Royalblau Metallic 2003 S4 Avant - Light Silver Mettalic 2016 S5 Coupe Black Edition - Ibis White
Last edited by RICKY D; 31st January 2017 at 08:49 PM.
|
|
#37
31st January 2017, 08:55 PM
|
||||
|
||||
|
Quote:
Gasket itself is available as separate part number, so can be easily renewed. P.S. I used 3M masking tape. It is great. And I use OLFA knives to cut it 
__________________
I'd rather drive on left
|
|
#39
21st March 2020, 06:53 PM
|
||||
|
||||
|
Quote:
I finally got around to trying to fit this cover - and its taken me ages! Perhaps to help others who may follow, my trouble was in locating the black bolt to mount the front bracket. OK, so maybe Im dafter than most, but I could not locate it from the first photo (and there are a few alternatives!). What I now understand (which may be obvious to those smarter than me) is that the power steering fluid reservoir has been lifted out of its bracket (obvious when you see Sergeys hand in the top left of the photo!) to show the bolt. I hope this might help those who might follow this thread and are as clueless as I obviously am!
__________________
2002 Final Edition S8. Ebony black with Silver Grey leather and myrtle wood trim. Current mods: solar sun roof, 20mm rear spacers, 15 mm on front, red brembo callipers, 6k headlights, rear view camera, engine remap, alloy dash dial rings, alloy navi rings, tt/phaeton pedal upgrade, (and custom matching foot rest) dension ipod interface & parrot hands free kit (both fully hidden), av input, tv in motion switched thro' PF switch in blanking plug right of steering column, Audi 'quattro' sill covers, repositioned centre console switches, radio clock, .Planned mods: auto-dimming rear view mirror, dash cam (as steamship's), fit the ski hatch, refit philips drl's (or maybe not - nope, definitely not - horrible botch!).
|
|
|
|


 Linear Mode

