
|
|
|||||||
| D2 - Fuel and Exhausts Everything to do with getting fuel into the engine, and fumes back out again |
 |
|
|
Thread Tools | Display Modes |
|
#1
 26th May 2012, 09:07 PM
|
|||
|
|||
|
Right firstly this isn't strictly D2 as it's on my 40V S6 so not 100% the same but it's similar and might be useful and as it's a fairly lengthy post, people can decide whether they want to read it all.
My passenger side exhaust developed a bit of a rattle about a week ago that sounded suspiciously like the cat on it's way out. Coupled with the persistant codes that I keep getting for rich running on bank 2 and bank 1 catalyst effect too small and having racked up 157K miles, I thought it might be worth swapping both cats, together with the pre-cat lambda sensors. I could have ordered all the bits via my contact at Audi and get a reasonable discount but I knew they'd still be far dearer than aftermarket and having spent an arm and a leg in the last 12 months on parts, any saving is worthwhile. The cats were ordered from www.catman.co.uk as I'd read favourable reports about them and they delivered my cats the next day for £585 for the pair. For the lambda sensors I had a trawl on the net which basically proved 2 things, a huge difference in prices and many different numbers for seemingly the same application. I wanted to avoid the so called umiversal sensors as these involve cutting and joining the wires to re-use the connectors. In the end I got 2 sensors with the correct connectors for just over £100. For the time being I will just change the pre-cat lambdas and re-use the post-cat sensors. It might seem false economy (and probably is) but they look fairly easy to swap, unlike the pre-cat ones which look a nightmare to swap in situ. I got stuck in and started by sticking the front end on 2 axle stands and removing the front wheels. I wanted to remove the LH side cat and downpipe first as this was the rattly one. With the wheel removed, you can get to 2 of the 3 nuts on the manifold flange just above the driveshaft as below. A liberal spray of penetrating oil and the 12mm nuts came undone fairly easily with none of the dramas and sheared studs you normally get with manifold bolts. They're a split, self-locking nut so I didn't have any concern about re-using them.  The upper nut isn't so easy to get to, in fact I couldn't even get a decent photo of it. However it is at the back of the LH cylinder head and I had to move the header tank out of the way to get to it, initially with a 12mm ring spanner and then a 3/8 drive socket. Just behind the driveshaft there's a mounting on the downpipe that is rubber mounted, this was easily removed by taking out the 13mm and 16mm bolts - no photo of it coming apart but there's one later of it re-assembled. The outlet end of the downpipe was disconnected by loosening the bolts on the sleeved joining piece in the exhaust that joined the cat pipe to my aftermarked exhaust system. Again no photo but pretty self explainatory. With all the fixings removed, I traced back and disconnected the wiring for the lambdas - there were a few cable ties around the gearbox and of the 4 lambdas, 3 have their connectors on the RHS bulkhead and one is on the LHS. The connectors are also colour coded - 2 black, one brown and one green. With all the fixings taken care of, the pipe can be removed. Its very tight at the top and you can just see the flared end of the pipe here:  and I could have done with the front of the car being higher in the air but in the end I managed to wiggle it free. Just needed to take care that the pre-cat lambda which is at the very top of the pipe didn't catch anything. The drivers side was removed in a similar manner as it pretty much symmetrically opposite although the downpipe bracket is slightly different. This is the 2 lower nuts for the manifold flange, no picture of the upper nut. It's even more hidden that the left hand one, I never actually saw it and had to rely solely on feeling around to get to it. Of the whole job, this one nut is the most difficult part to get to but perseverance and small hands payed off in the end.  Here's the new pipes with the pre-cat lambdas fitted - LH at the top, RH below. Note the different support brackets and the loose flange coupling to allow pipe adjustment. Note also how close the lambdas are to end of the pipe, how much they protrude and how this will affect re-fitting the pipes. The lambdas come with what is presumably anti-seize compound already on the threads and are just tightened with a 22mm open ended spanner.  Here's the complete pipes, only one post-cat lambda is fitted here and the wires are cut off. This was because the sensor was very tight to remove from the old pipe. Despite a generous spray of penetrating oil, I was concerned it was too tight for an open ended spanner so rather than risk rounding it off I cut the wire and used a ring spanner. This meant I had to re-join the wiring which was be done with crimped splices and heatshrink tubing - solder can't be used as the wiring looks like stainless steel and solder won't take to it.  The pipes were re-fitted in true Haynes style - the reversal of removing them. The passenger side was first, threading the pipe in place and loosely fitting the manifold end first, this is the best picture I could get of the upper nut and flange: 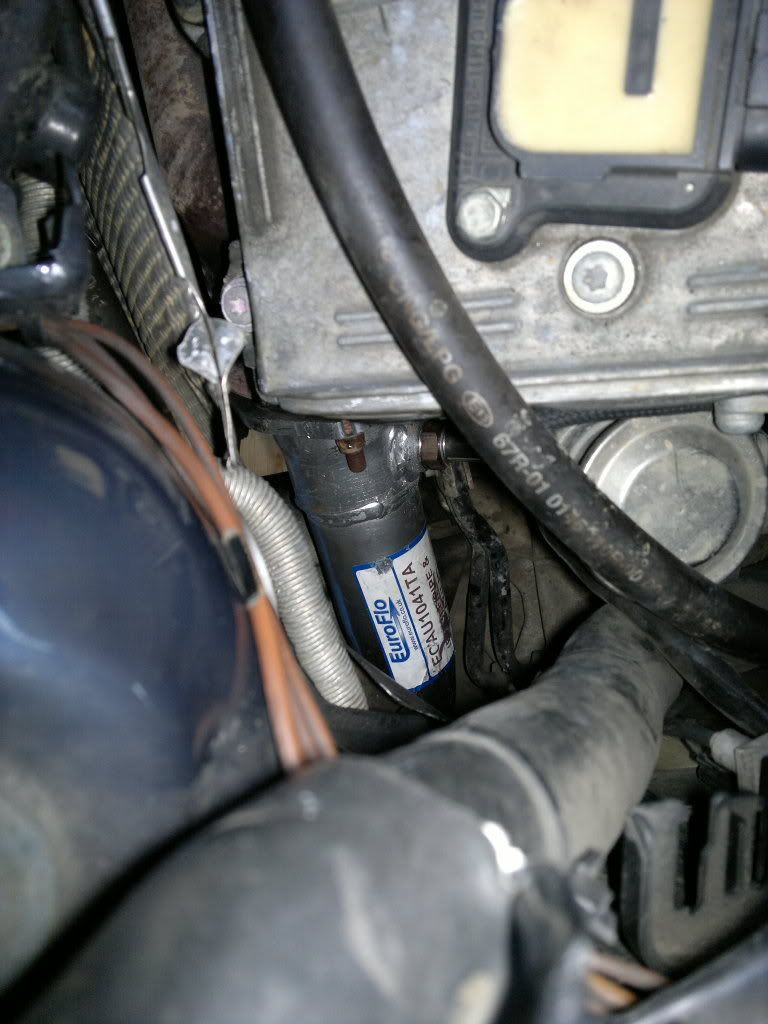 then fitting the intermediate support which is shown here:  The clearance around the pipe was checked all over before the fixings were tightened and the wiring re-routed and reconnected. The drivers side was slightly more difficult to fit, I couldn't get the end of the pipe over the driveshaft area. You can see the end of the pipe (and lambda) here and in order to get the pipe in place, I removed the cast alloy shield that goes over the driveshaft and is held with 3 allen bolts. I don't know how I got the old pipe out with this in place so maybe the shape of the pipes were slightly different but eventually the new pipe was in place with a bit of persuasion. This is the support bracket on the RHS - the orange string was tied onto the old lambda wiring when it was removed and was used the pull the new wiring back into position. 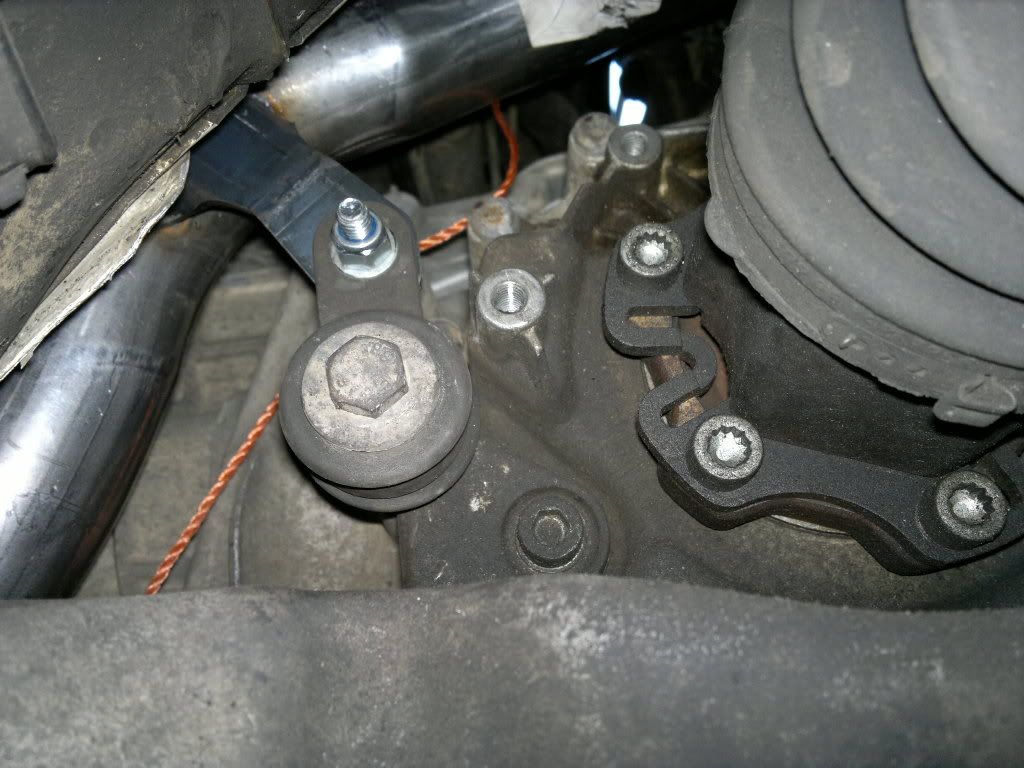 With everything re-fitted and all the wiring connected, I used VCDS to clear the old fault codes before taking the car for a gentle drive for 20 minutes or so which was recommended by catman. Everything worked, no engine light as yet (no doubt that'll be back shortly as usual) but we'll see how we get on. The old cats will be taken somewhere I can get cashback on them - probably not much but better than nothing  and here's the old pre-cat lambdas, LH on the left, RH on the right. The LH one rattled when shaken but I couldn't get anything to drop out so maybe it was fractured internally but still holding together. The RH cat had a VAG part number and stamp on it (still original?) whereas the LH one had no markings at all so maybe this was already replaced.  Slightly more deposit on the LH one which might be a sign of running rich, or maybe not. Either way they've been replaced and I'll see if there's any difference in how it runs over the next few weeks and report back any findings. Last edited by richyb66; 26th May 2012 at 09:15 PM. 
|
|
#2
27th May 2012, 10:22 AM
|
||||
|
||||
|
Excellent write-up, Rich. No doubt this will be useful to many on here. Hopefully, this will get stickied for ease of future reference.
__________________
 2006 Audi A8 D3 Quattro Sport 4.2 TDI - Silver, Family Oil Burner. 2000 Audi A4 Quattro Sport 2.5 TDI - Santorin Blue, S8-Powered DTM Race Car Build In Progress. 2000 Audi A4 Quattro Sport 2.8 30V - Pelican Blue, RS4 Widebody, D3 4.2 01E, High-Spec B5 Build In Progress.
|
|
#3
28th May 2012, 11:36 AM
|
|||
|
|||
|
Just for comparison, Audi just quoted £929-80 incl VAT for each down pipe - and that's exchange but would do the pair for £1732 incl VAT (hardly a generous discount) and even suggesting going the de-cat route.
My contact would have got me a bit more off these prices but I can't see him halving them.
|
|
|
|


 Linear Mode

