Decided the sump is too scruffy to put back on, so this is getting blasted and repainted tomorrow.

Alloy oil cooler pipe. This one had already had a replacement plastic pipe fitted, but since I took it apart to check it got the upgrade anyway.

Oil cooler back on. I've discovered it is much easier to attach the cooler block with the water pipe already in it than to do them separately. Obviously thats only with it out of the car.

Locked the cams in preparation for doing the chain tensioners. I forget - have I done a detailed write-up of how to do this job? I'm sure I have, but if not I'll make a separate thread if anyone cares to know the details - I took loads of pictures.

Right hand side first

Mark the chain according to the notches in the cams and the arrows on the caps

Good tramlines in this one

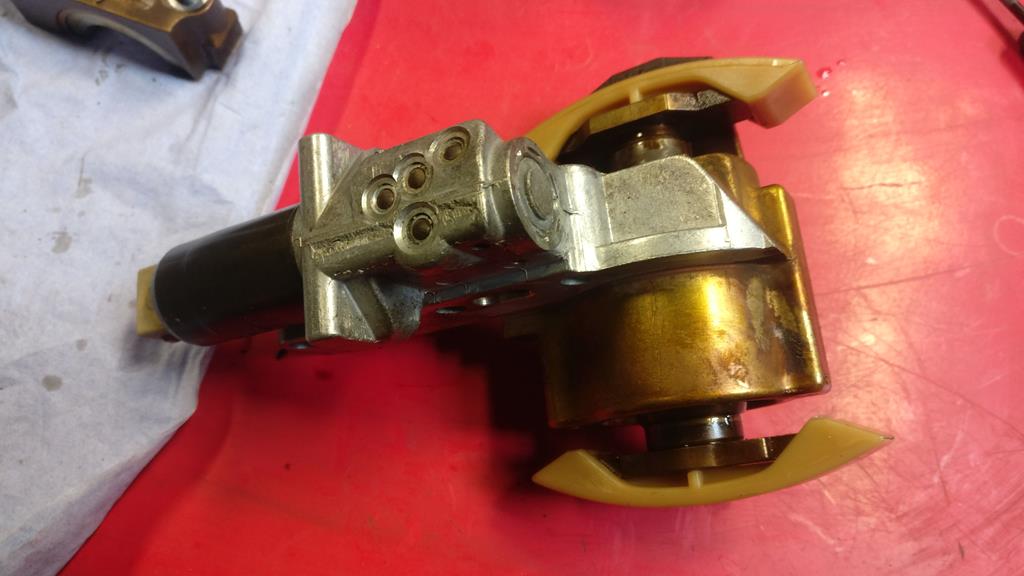
A close escape! The gauze is intact but coming detached, and would soon have gone in to the tensioner and ruined it.

Peeling apart

This is the passenger side - the gauze has already gone, but on the passenger side it will be sitting in the bottom of the tensioner and not causing any damage, unlike on the driver's side where it gets stuck in the start pin.

Tensioners are still good

This is the driver's side which is firmly locked in place on the start pin. The bottom foot doesn't move at all, the top one moves on it's spring

Warm up the new tensioner pads in a cup of hot water

New pads fitted to the tensioner
Victor Reinz cam cover gasket. If you look around these can be had for ~£20 a side - less than half the OE version (£46 each).

Cam cover cleaned up and the new gasket fitted

Assembly lube on everything (including under the cam caps I removed) as this engine has been sat for a long time and is very dry inside. This should help reduce wear when it turns over again, and will just dissolve in the oil when it starts. I'm using this instead of oil as it is very sticky so will stay put until I need it, whereas oil would just drip away.

On to the crank front oil seal. This is a pain to fit as it is very narrow in a pretty tight space, and it sits over a bushing rather than the crank itself.

This is the bushing, which is clamped to the oil pump gear by the crank sprocket. Normally I put the seal in first, then push the bushing in but it is very difficult indeed to get the bushing in to the seal without folding over the outer lip.

So a custom tool is in order

The alloy piece on the left sits over the bushing which has the oil seal fitted to it off the engine. The tool then allows both the bushing and the seal to be pressed in to the front cover in one go, thus ensuring no damage to the seal

It fits together like this - tool on the bottom, bushing sitting in it, and the seal around the bushing

Fitting it to the engine. There is a precise relationship between the bushing and the seal. The tool is machined to just the right depth so that when the bushing bottoms out on the crank, the seal is pushed in to the correct depth.

Done. Very pleased with how this worked
You can see how tight the outer lip is on the bushing.

A new bolt is needed for the crank sprocket. This has been already been tightened to 200Nm with the torque wrench. Now it needs another 180°


Luckily I have eaten a
lot of cake over lockdown

It was bending both the breaker bar and the engine stand, but I managed it.

Timing gear back on, but the new belt isn't here yet so it'll stay like this for a few days.
