
|
|
#1
 8th May 2009, 09:51 AM
|
|||
|
|||
|
As a few of you already know I am hoping to carry out a subframe swap on my '95 A8 D2 4.2 Quattro
The car is currently up on axle stands and I have the full front end and engine bay partly stripped down  Plan of action is to:
Questions: How much does the Engine and gearbox weight? What is a suitable rating crane to use? What is the best method for lifting? A u-bolt through each engine block hole with a strap from each connecting to the crane? Cheers Andrew 
|
|
#2
8th May 2009, 10:58 AM
|
||||
|
||||
|
Andrew,
To answer the questions first: Your engine weighs 195Kg dry Gearbox is approximatly 60Kg dry A half ton lift will do. As for lifting its not necassary.  Here is what I would do to change my subframe. Get a strong steel bar that will span the engine bay. Get some wooden chocks and wedges. Disconnect the 2 bolts to the engine resilient mounts from underneath the subframe, and the same for the tranny. put a thick wooden pad under the engine sump to spread the load and using a jack lift the engine a couple of inches. Put wooden pads on the suspension tops and lay the bar across. Use chains from the 4 lifting points with either shackle bolts or just bolted and then wedge the bar up with 2 wedges either side so that the chains have the weight of the engine. Put a jack under the end of the grearbox and take the weight of the gear box. Undo the 4 main bolts and 6 rear plate bolts and drop the subframe. Remove and replace with the new one.   Gotta go will finish this later. Work calling! 
__________________
Conan (the Librarian) Watch it if you dare Currently, 2000 S8, Merlin Purple, Leather Pack 1, Winter Pack 1, SPAX adjustable suspension, AP Racing 6 pot front caliper, 385mm fully floating disks, EBC Yellow Stuff Pads, Black Diamond grooved rear disks and predetor pads, D2 Doctors Brake Block. 1997 4.2 A8SQ - the Projekt. 12 years and ongoing! 1997 4.2 A8SQ - Ming Blue. Restoration sat waiting; saved from the Scrapyard 2003 C5 Allroad 4.2Q - Cobolt Blue. Towing car. Laid up awaiting manual conversion. 2005 C5 Allroad 2.5TDi FE - Grey - Workhorse. 2015 Q3QS SLine - Daytona Grey. Lots of extras! Long Haired Admirals cutter. Previously 2003 C5 A6 1.9TDI FWD - Loaner from D2 Doctor Lifex 1997 S8 - Ming Blue. Loaned out and written off. I loved that car. My first engine swap after cambelt failure. 1996 4.2 A8SQ - Ming Blue. 178k on a cambelt! Trader's 8. Delivered to A8Parts at Lifex. 2003 2.8 A8SQ - powder blueish. Fill in for a while. Sold on. 1998 1.8T A4 Avant FWD. Ming Blue (there's a theme here), PEX for the 97 S8. And a list of non VAG going back 40 years before I saw the light. 
|
|
#3
8th May 2009, 11:51 AM
|
|||
|
|||
|
Sounds like a good method, have you used it before?
I've just sourced a 1000kg crane aswell, looks like I wont be needing it anymore! Now to source some sort of strong, thick metal bar
|
|
#4
8th May 2009, 02:28 PM
|
|||
|
|||
|
Scaffolding tube should be up to the job I'd have thought - that's what we used to use for lifting engines with rope before we could afford hoists/cranes
 Mind you, they were only mini engine/box and cavalier engines, not quite as heavy as the v8 lump.
|
|
#5
8th May 2009, 04:21 PM
|
||||
|
||||
|
Following o from above.
I haven't used the method but it's a variant on the Audi process when removing the tranny which requires the subframe to be dropped to let the tranny out. Audi have a special tool........ As long as the engine can't move and the tranny is held in place then the subframe should drop away. You won't be able to remove the rear lower control arm as the bolt wont come out until the subframe is lowered. When you re-assemble on the new subframe put the bolt in the other way so you can strip the suspension down in the future without dropping the subframe. Like this: 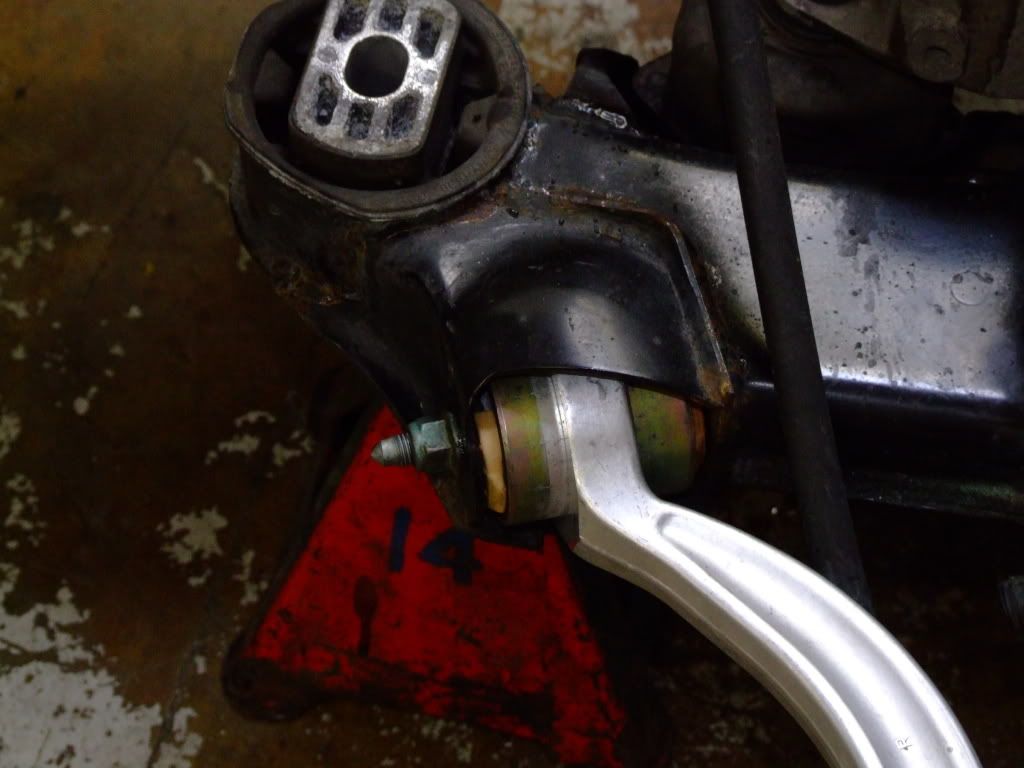 HTH
__________________
Conan (the Librarian) Watch it if you dare Currently, 2000 S8, Merlin Purple, Leather Pack 1, Winter Pack 1, SPAX adjustable suspension, AP Racing 6 pot front caliper, 385mm fully floating disks, EBC Yellow Stuff Pads, Black Diamond grooved rear disks and predetor pads, D2 Doctors Brake Block. 1997 4.2 A8SQ - the Projekt. 12 years and ongoing! 1997 4.2 A8SQ - Ming Blue. Restoration sat waiting; saved from the Scrapyard 2003 C5 Allroad 4.2Q - Cobolt Blue. Towing car. Laid up awaiting manual conversion. 2005 C5 Allroad 2.5TDi FE - Grey - Workhorse. 2015 Q3QS SLine - Daytona Grey. Lots of extras! Long Haired Admirals cutter. Previously 2003 C5 A6 1.9TDI FWD - Loaner from D2 Doctor Lifex 1997 S8 - Ming Blue. Loaned out and written off. I loved that car. My first engine swap after cambelt failure. 1996 4.2 A8SQ - Ming Blue. 178k on a cambelt! Trader's 8. Delivered to A8Parts at Lifex. 2003 2.8 A8SQ - powder blueish. Fill in for a while. Sold on. 1998 1.8T A4 Avant FWD. Ming Blue (there's a theme here), PEX for the 97 S8. And a list of non VAG going back 40 years before I saw the light.
|
|
#7
8th June 2009, 09:12 PM
|
|||
|
|||
|
Finally picked up the crane tonight!
Should hopefully get some work done tomorrow, plan out how i'm going to do this and get it done asap
|
|
#8
9th June 2009, 04:18 PM
|
|||
|
|||
|
Today I:
removed the front arb and 1 set of bottom arms. Couldnt get the other set bottom arms as Conan stated above, you have to drop the subframe so that you can get into them. I did get a small 18mm socket and rachet onto it and started to turn them but it felt dodgy, like it was about to burr or slip. Are they 18mm bolts either side? I disconnected the throttle setup to create room at the back of the engine so that I can get into the engine block holes. I need to come up with how I am going attach the engine to the crane through the engine holes and buy whatever I need. I started to remove the arch covers to create more room and to clean everything up while i've got the car stripped down. Couldnt get the passenger side off due to being unable to take off two plastic clips that hold it on. Looks like you need to pull the center of the clip out to release it. Usually you have to push them through and then they pop out. Didnt have the right tool to get a good grab on it and pull it out so instead of destroying them like I did on the other side i've left them til I get a decent tool. 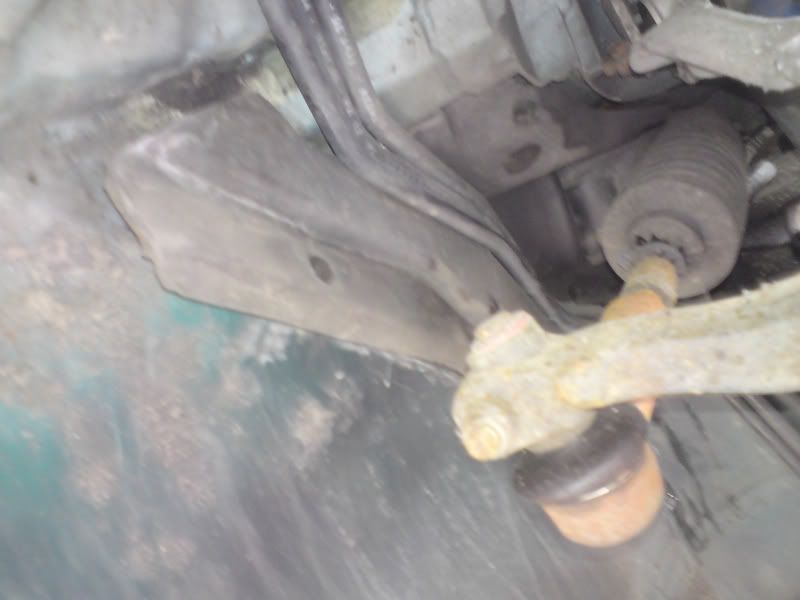 What is this foamy part, is it needed? Mine is thick with dirt and soaking wet. Is that a drainage point above it?  picture of said plastic clip that I'm trying not to break. 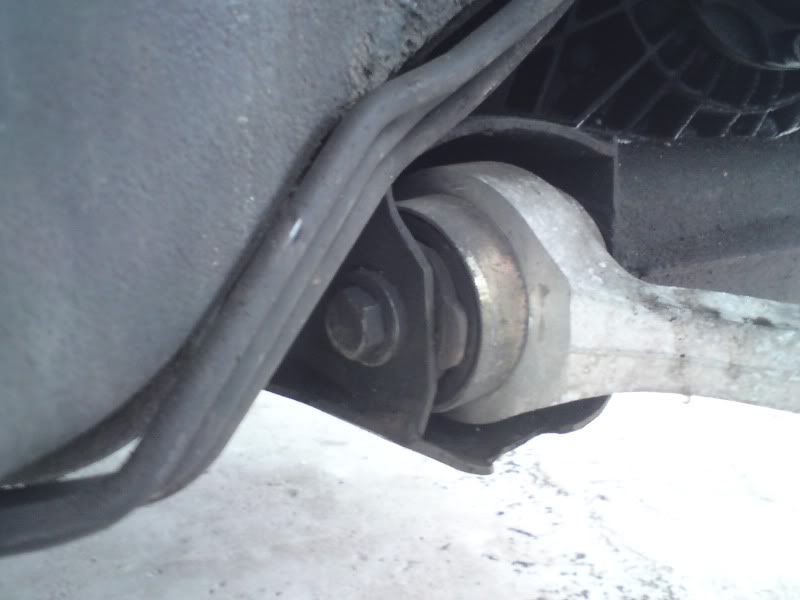 bottom arm that I've not removed yet. 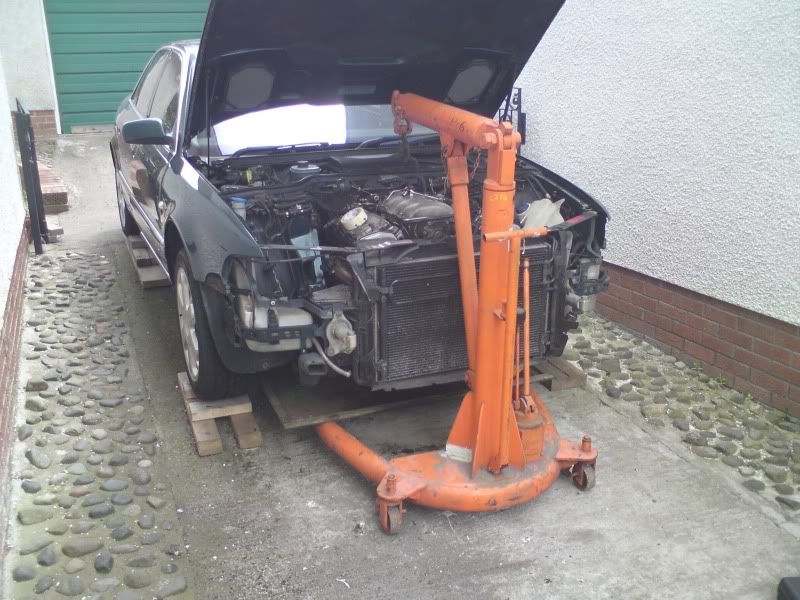 crane  as far as it will go in on lowest reach setting 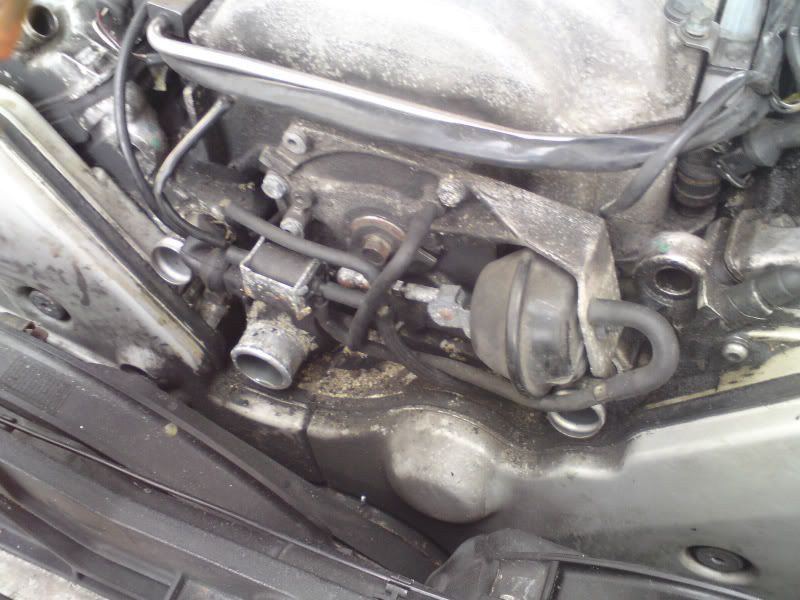 what is this? does it control the cruise control? Trying to move it by hand but is extremely stiff Last edited by AndrewGray; 9th June 2009 at 04:21 PM.
|
|
#9
9th June 2009, 05:05 PM
|
||||
|
||||
|
Quote:
HTH
__________________
Conan (the Librarian) Watch it if you dare Currently, 2000 S8, Merlin Purple, Leather Pack 1, Winter Pack 1, SPAX adjustable suspension, AP Racing 6 pot front caliper, 385mm fully floating disks, EBC Yellow Stuff Pads, Black Diamond grooved rear disks and predetor pads, D2 Doctors Brake Block. 1997 4.2 A8SQ - the Projekt. 12 years and ongoing! 1997 4.2 A8SQ - Ming Blue. Restoration sat waiting; saved from the Scrapyard 2003 C5 Allroad 4.2Q - Cobolt Blue. Towing car. Laid up awaiting manual conversion. 2005 C5 Allroad 2.5TDi FE - Grey - Workhorse. 2015 Q3QS SLine - Daytona Grey. Lots of extras! Long Haired Admirals cutter. Previously 2003 C5 A6 1.9TDI FWD - Loaner from D2 Doctor Lifex 1997 S8 - Ming Blue. Loaned out and written off. I loved that car. My first engine swap after cambelt failure. 1996 4.2 A8SQ - Ming Blue. 178k on a cambelt! Trader's 8. Delivered to A8Parts at Lifex. 2003 2.8 A8SQ - powder blueish. Fill in for a while. Sold on. 1998 1.8T A4 Avant FWD. Ming Blue (there's a theme here), PEX for the 97 S8. And a list of non VAG going back 40 years before I saw the light.
|
|
#10
9th June 2009, 06:55 PM
|
|||
|
|||
|
Thanks for all the info Conan!
Is there a drainage point above the foam inside the inner arch? I know my drainage points are blocked so it'd be good to clean them out while the car is in pieces. The ones i've read about go from the scuttle down to either side of the gearbox - i've not found these yet, finding it very hard to see in about the scuttle where they should be. For the "inlet manifold variable length inlet primaries part" can I safely degrease it all and regrease it? What would be a suitable grease for it? As for reach, do you think I should just attach it by the two block holes at the back of the engine or should I do all 4?
|
 |
|
|


 Linear Mode

