
|
|
|||||||
| D2 - Transmission Gearboxes, diffs, drive shafts. |
 |
|
|
Thread Tools | Display Modes |
|
|
|
#1
 7th April 2012, 03:31 PM
|
||||
|
||||
|
Quote:

__________________
 2006 Audi A8 D3 Quattro Sport 4.2 TDI - Silver, Family Oil Burner. 2000 Audi A4 Quattro Sport 2.5 TDI - Santorin Blue, S8-Powered DTM Race Car Build In Progress. 2000 Audi A4 Quattro Sport 2.8 30V - Pelican Blue, RS4 Widebody, D3 4.2 01E, High-Spec B5 Build In Progress. 
|
|
#2
7th April 2012, 04:51 PM
|
||||
|
||||
|
Love this thread and the detail. Photos good and can't wait for more when available. Thanks
__________________
D2 FL Q 2.8 V6 2002 Taxi(?) spec - no heated seats headlight washers etc. D2 PF Q 2.5 tdi LHD rear blinds and heated rear seats, Bose, 5 speed Tip, Servotronic, Pioneer AVIC 333,333 km Murdered on a P&O ferry 2012. Cat3 write off
|
|
#3
7th April 2012, 08:02 PM
|
|||
|
|||
|
Quote:
Anywhooo... on with the photos. Sooo the car is on the ramp. First thing out of the way is the exhaust. We ended up cutting through the clamp bolts and some of the flange bolts. The clamps did however still slide out of the way. 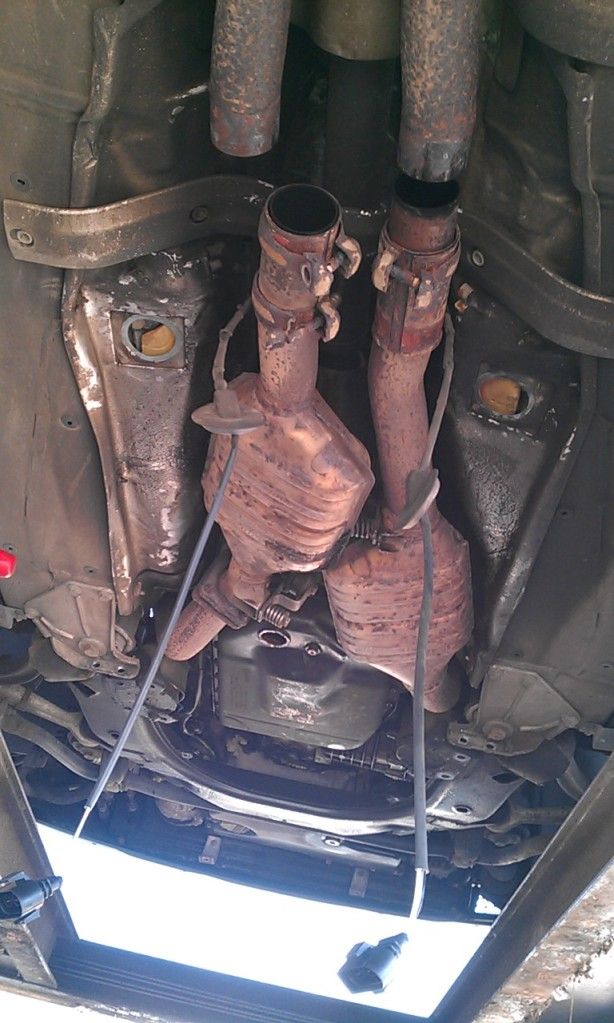 Yes I did start it up like this  Couldn't help myself. I'm very tempted to do something silly with the exhaust as it sounds soooooo good! Couldn't help myself. I'm very tempted to do something silly with the exhaust as it sounds soooooo good!One CAT out of the way with Lambda sensor. You can get to the wiring from under the front carpets which thankfully just lift up. 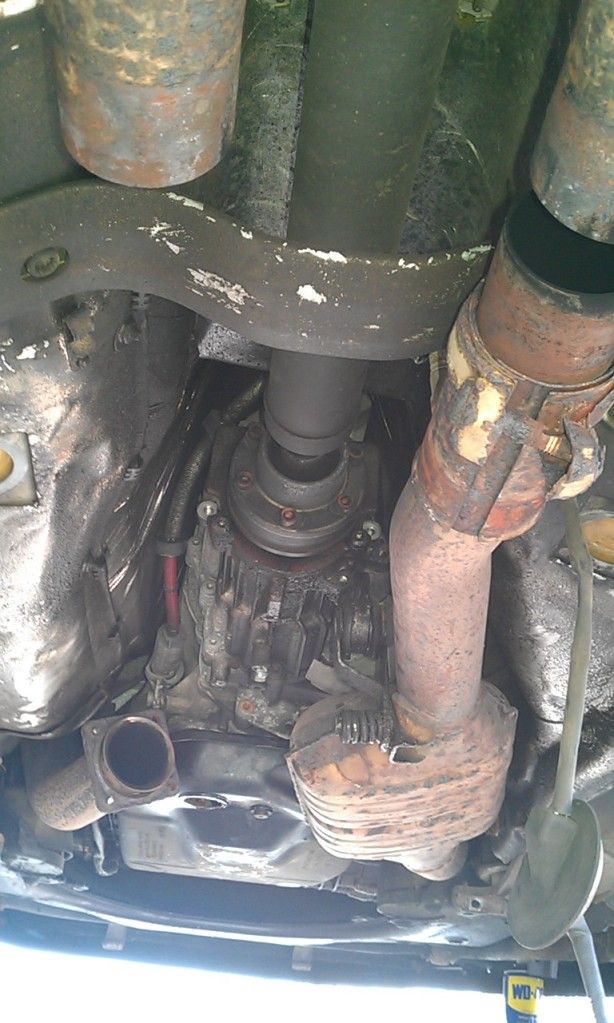 The downpipes are a real sod to get off. Some of the nuts are accessible from above, some from below but it took all manner of extensions, UJs etc to get to them individually. 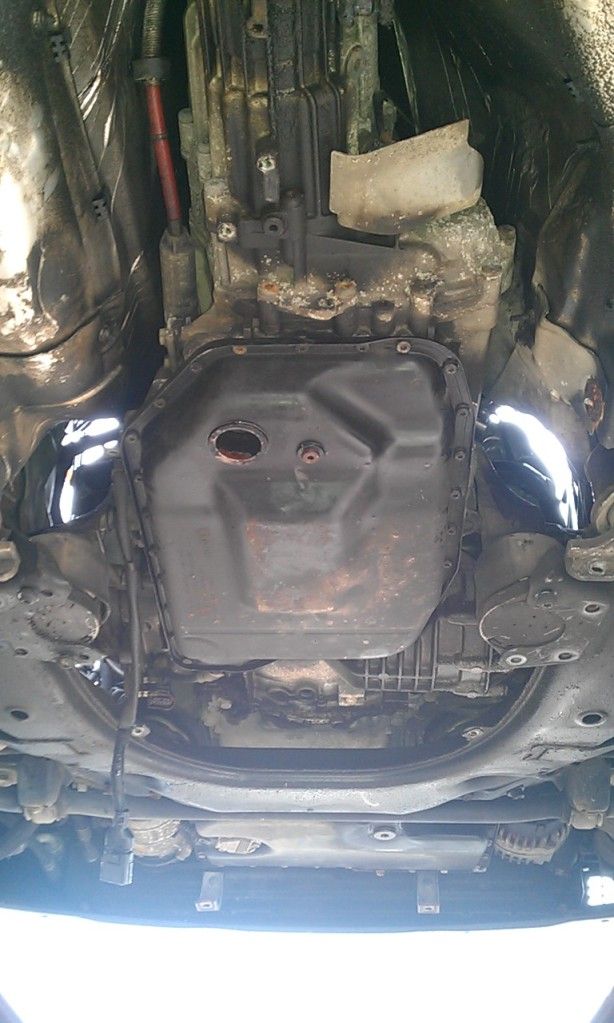 The pile of stuff removed grows... 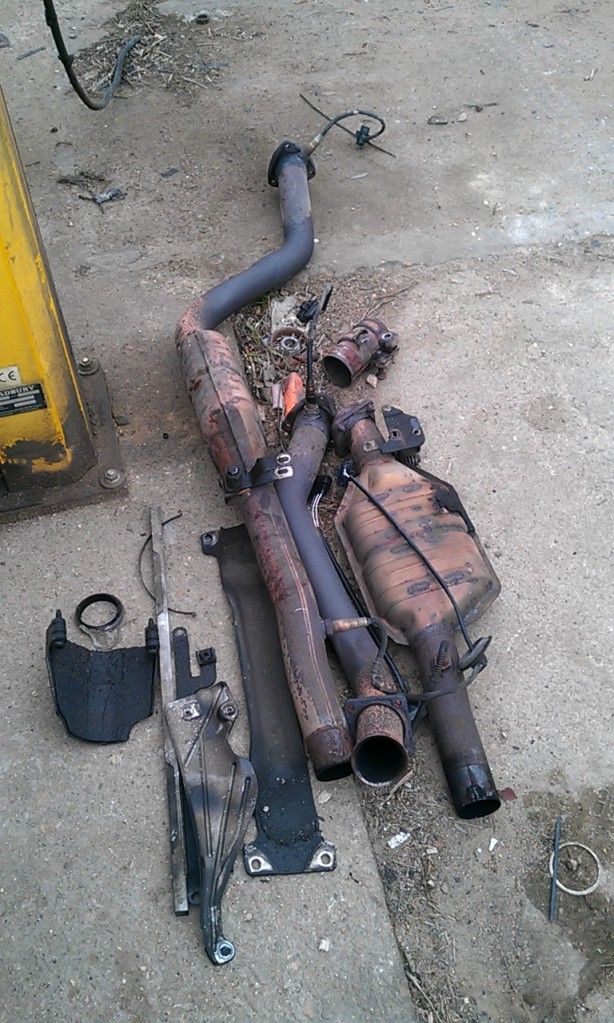 Wheels off to get to the driveshaft bolts and CV boot shields. 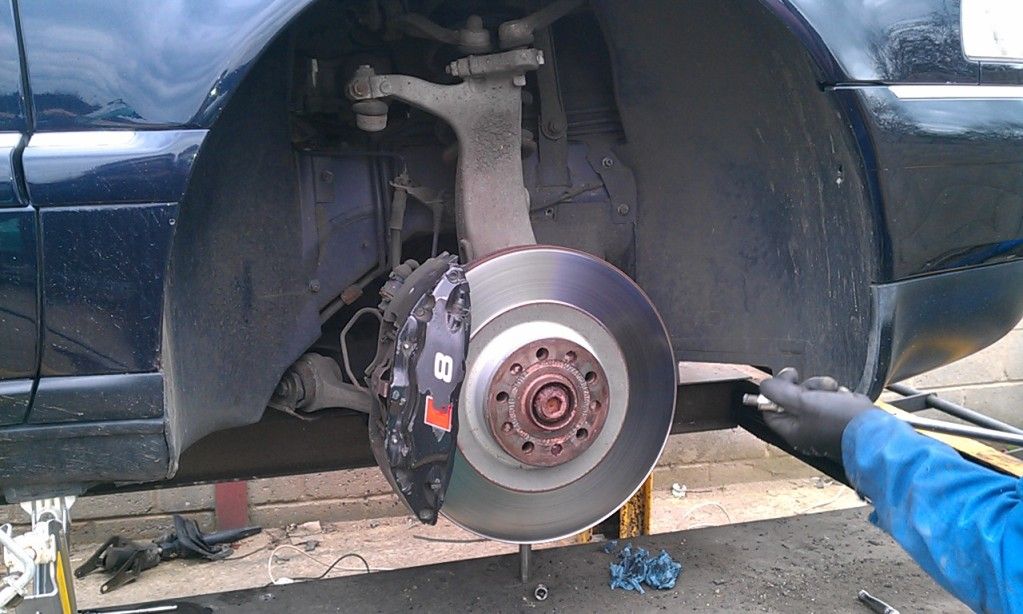 Axle stand out of shot. It was at this point that I realised that the starter motor was going to be one of the toughest things to remove. You've got to remove this to get to the torque convertor bolts. The problem is that it sits behind the right hand engine mount. FUN! You can't remove the mount easily as there's no room. You can just see the bottom starter motor bolt in this photo. 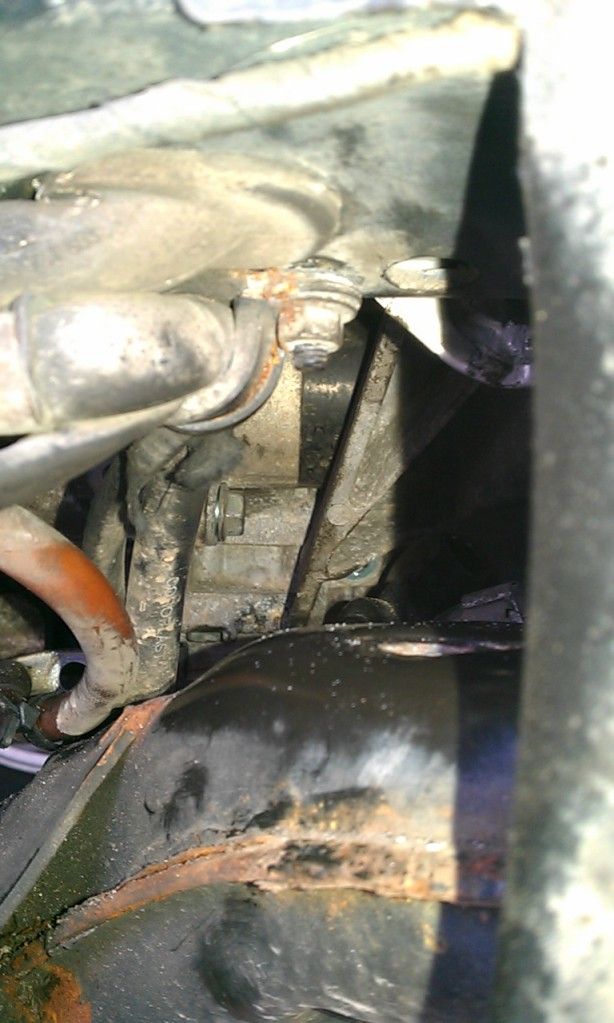 I ended up loosening the subframe, working out just how far I could drop the bolt out so that it still 3 turns of threads going into the bodyshell. With this, I managed to get the engine mount just out of the way to get to the starter motor. 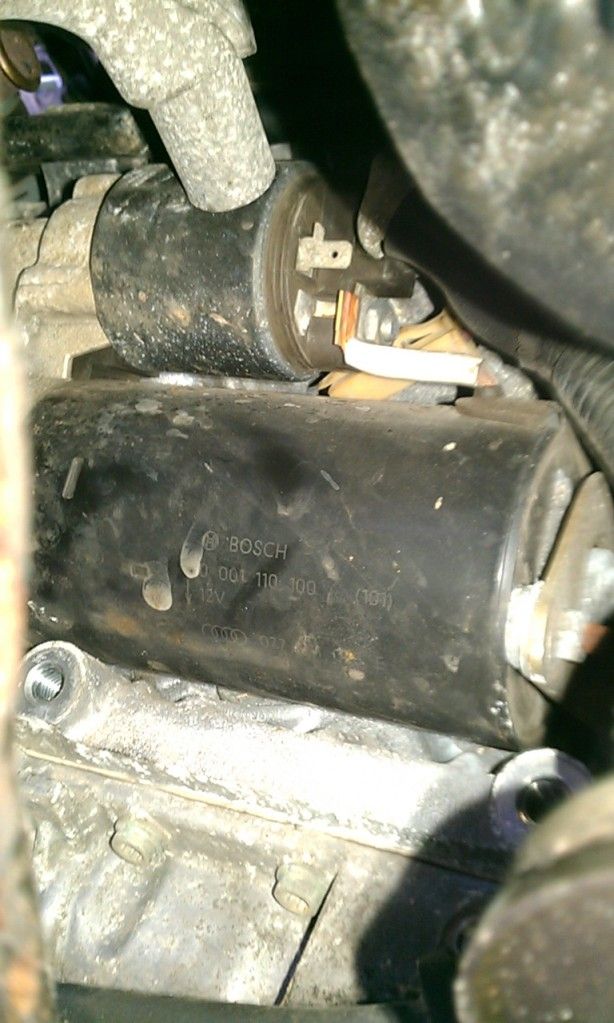 A little bit more jiggery pokery and I managed to get bolt the engine mount and starter motor out of the way. Now we can get to the three flex plate TO torque convertor bolts out. 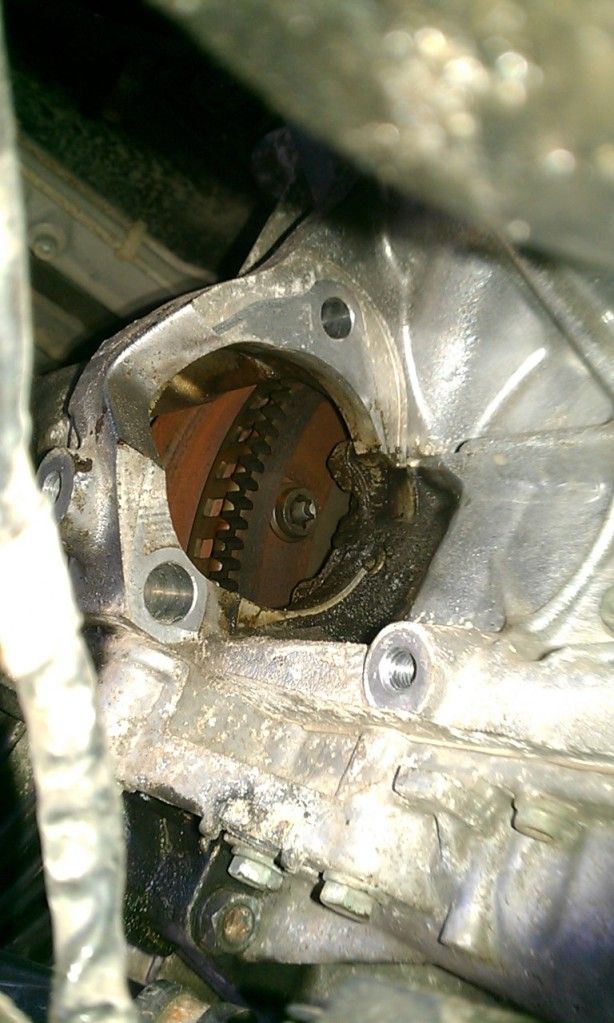 Here's how the starter motor and engine mount sit when bolted up. 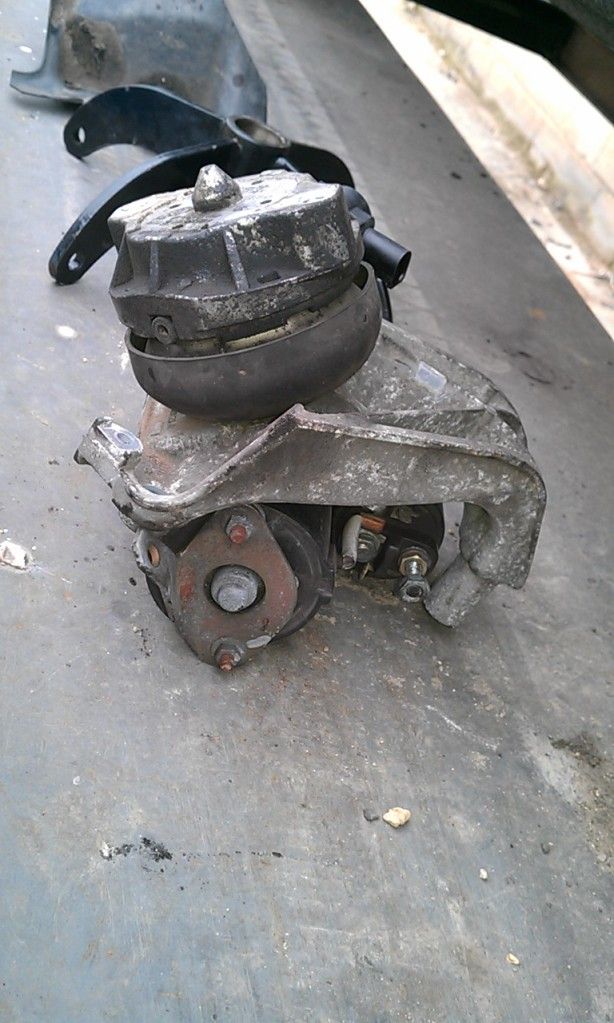 If anyone ever asks you to 'just' change the starter motor on an Audi V8... run away! More to come... MG Last edited by SyncroS8; 7th April 2012 at 08:04 PM.
|
|
#4
7th April 2012, 08:16 PM
|
|||
|
|||
|
This was where it got fairly serious and the camera got left out a bit.
The list of stuff to remove... Wiring, crank sensor, oil pipes (clamp these or oil goes everywhere!), shifter rod, propshaft (we managed to leave it in situ rather than have to drop the rest of the exhaust to get to the rear bolts), drain the oil!, Trans mounts, cv joint shields, last bit of wiring to the back of the gearbox from the engine. I'm sure that there's stuff I've forgotten! We're now at the point of having the gearbox jack supporting the gearbox and trying to work out how to get the thing out! In the end, we dropped the back of the subframe down and there was enough room to get the trans out. Everything gets covered in oil as the torque convertor never separates as it should from the flex plate so you're slipping around a bit. Gearbox in the Skoda ready to home.  Sooooo with the gearbox at home on the bench. It's time to start the strip down. MG Last edited by SyncroS8; 8th June 2012 at 01:16 PM.
|
|
#5
7th April 2012, 08:50 PM
|
|||
|
|||
|
Firstly, this is one BIG gearbox. I think it tips the scales at around 160kg. Not the kind of gearbox you want to try and catch or have drop on your toe.
I've put my garage mug in the photo to give you an idea of the size. Please bear in mind that this is the first Auto Transmission I've ever stripped down, I don't have the manual (it's not cheap and I am!) and I'm working on 'this looks fairly obvious as to how it comes to pieces' or 'that's not good' for condition of parts. Plus the internet is a very powerful tool for this stuff. 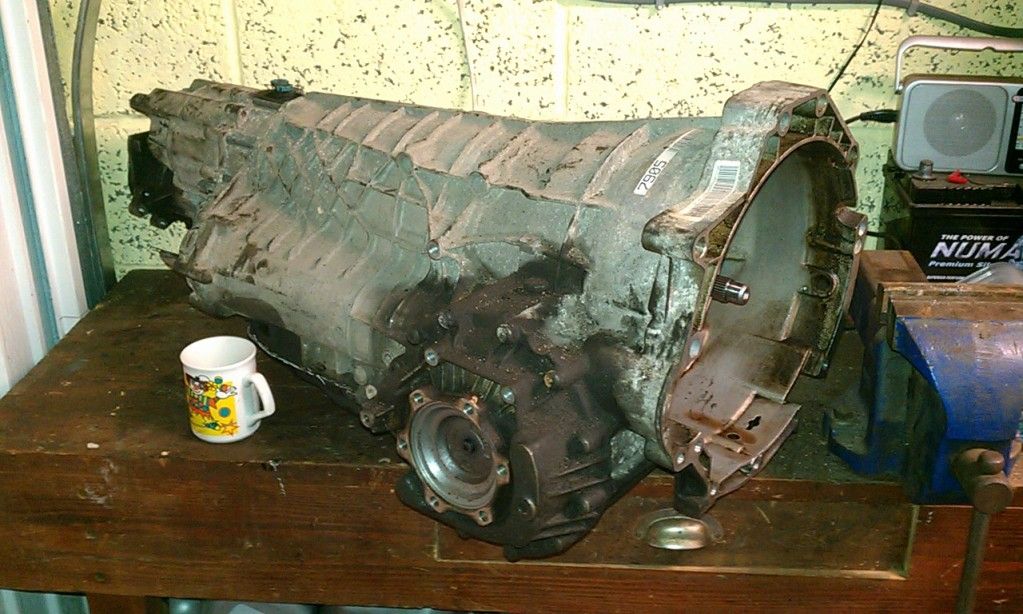 So, remove the torque convertor and you're looking at a load of torx bolts. 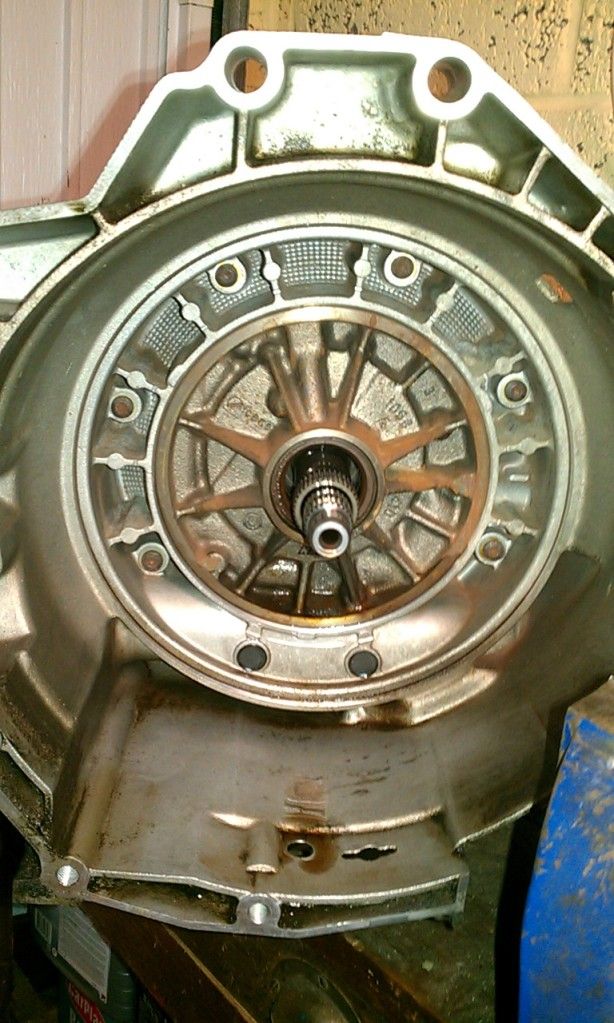 Not forgetting the two small rubber caps at the bottom behind which are two more bolts. 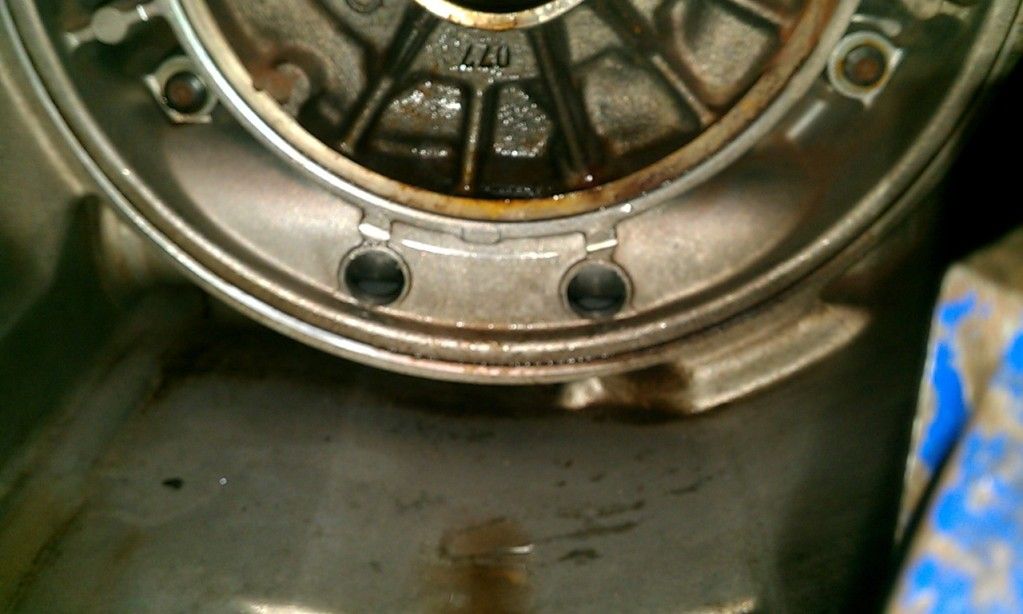 Once you remove these caps, it becomes obvious that the bolts are behind the flange shaft which goes into the diff. What's more, they're behind a tube inside which runs the shaft. So... out with the diff. Unbolt the flange by removing the centre bolt in the flange followed by all the bolts holding the side plate on. 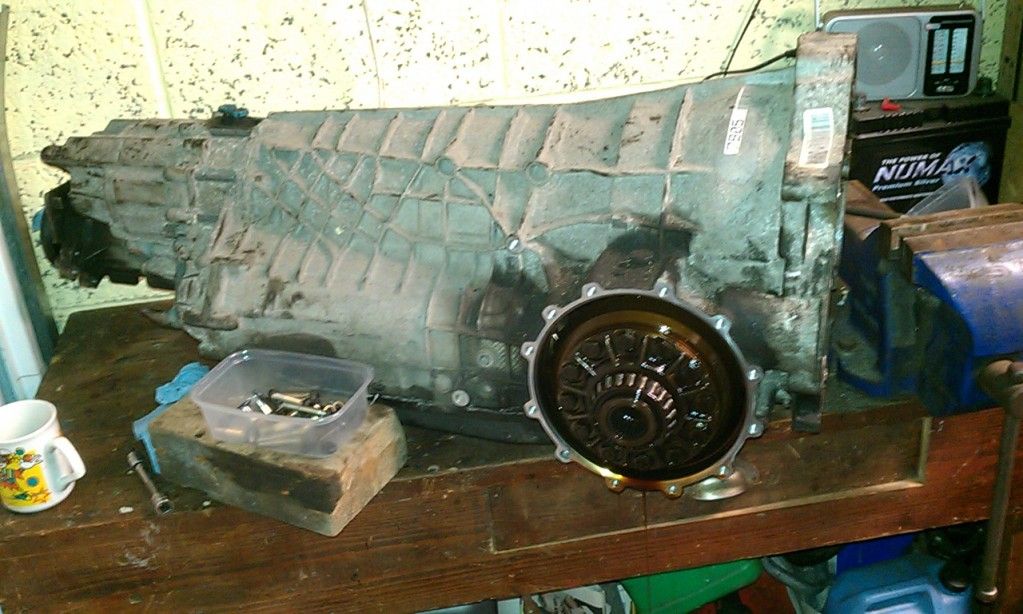 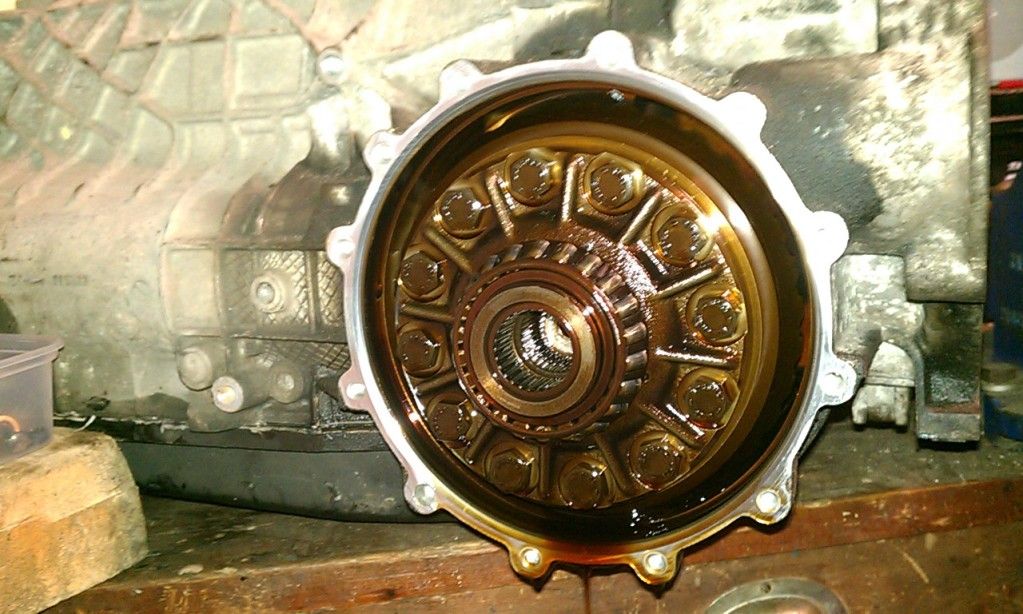 Be careful pulling the side plate off like this as the diff is more that likely to drop out too.. and it's rather heavy! Now, remove the three bolts which hold the bearing housing from the other side of the gearbox which are just behind the driveshaft flange. I also removed the speed sensor here just to stop it from being damaged. 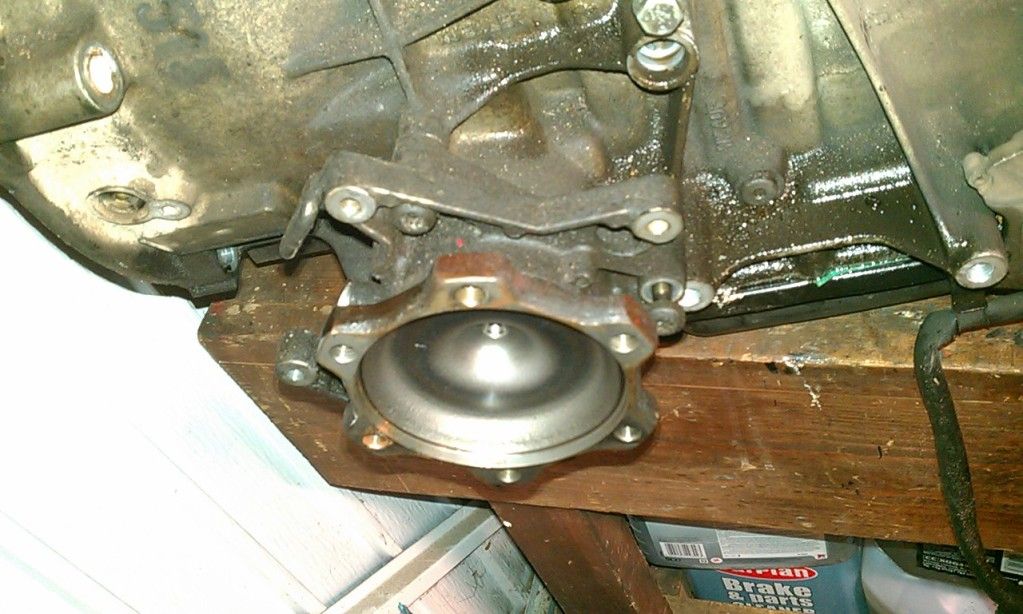 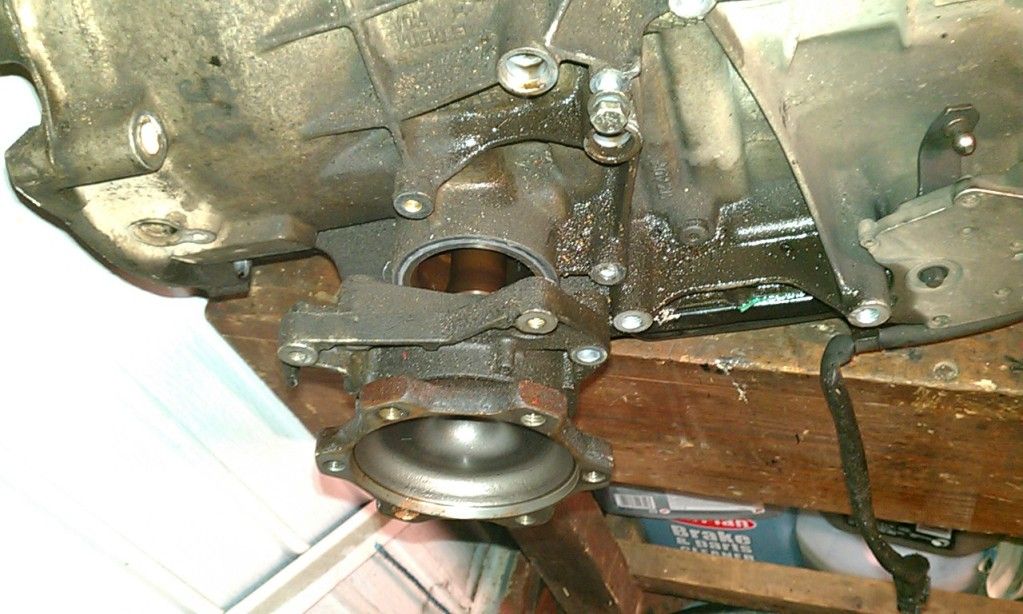 Pull the shaft out and there's the hole! 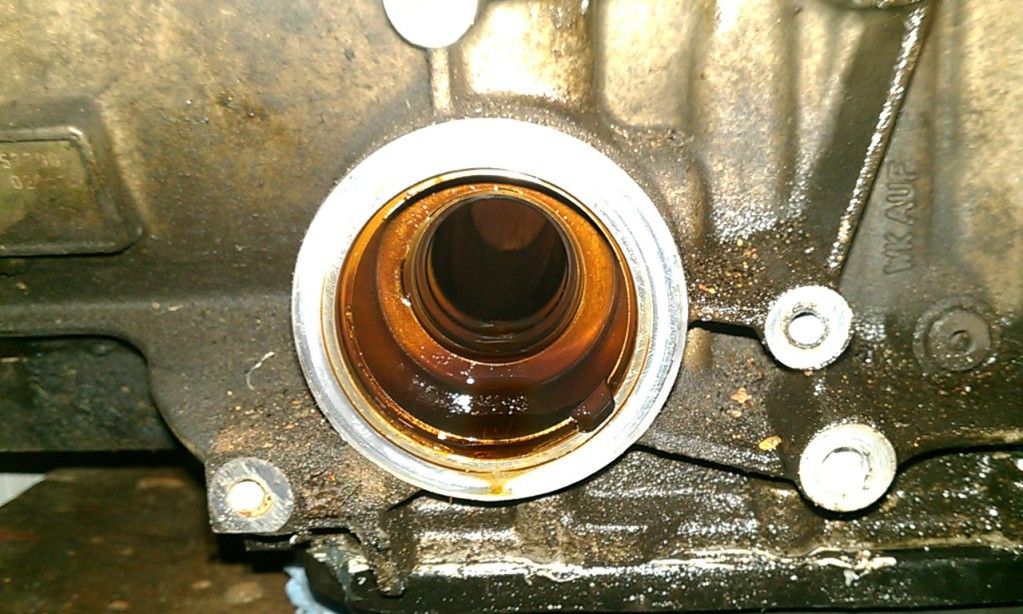 With a circlip! 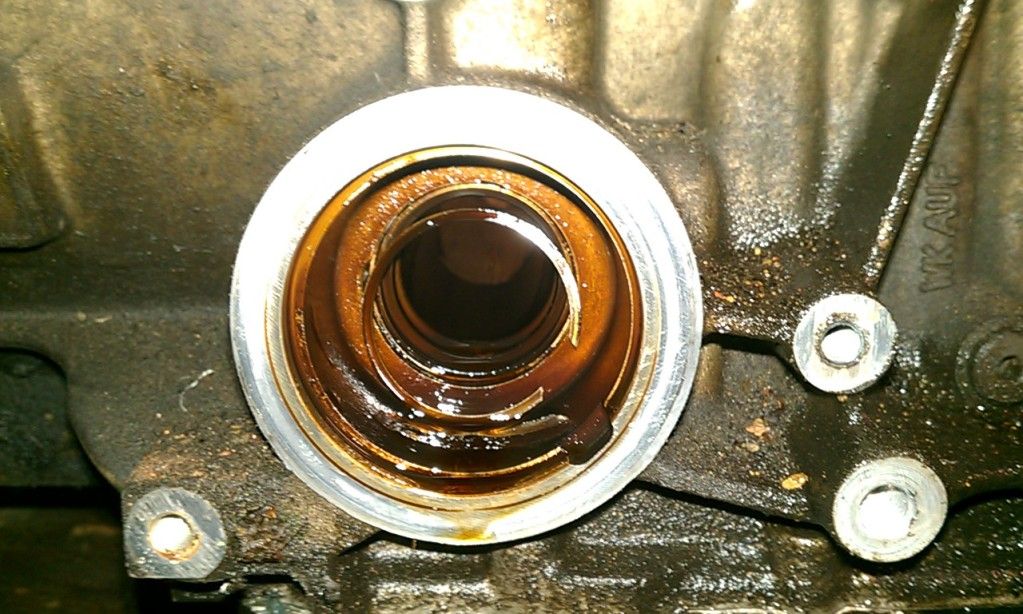 Which hold the tube in place. Turn the gearbox around and give the tube a tap to get it moving and it comes out where the circlip was.  It was at this point that I turned my attention back to the intermediate plate which houses the oil pump. Now you can see the bolts rather than a tube! 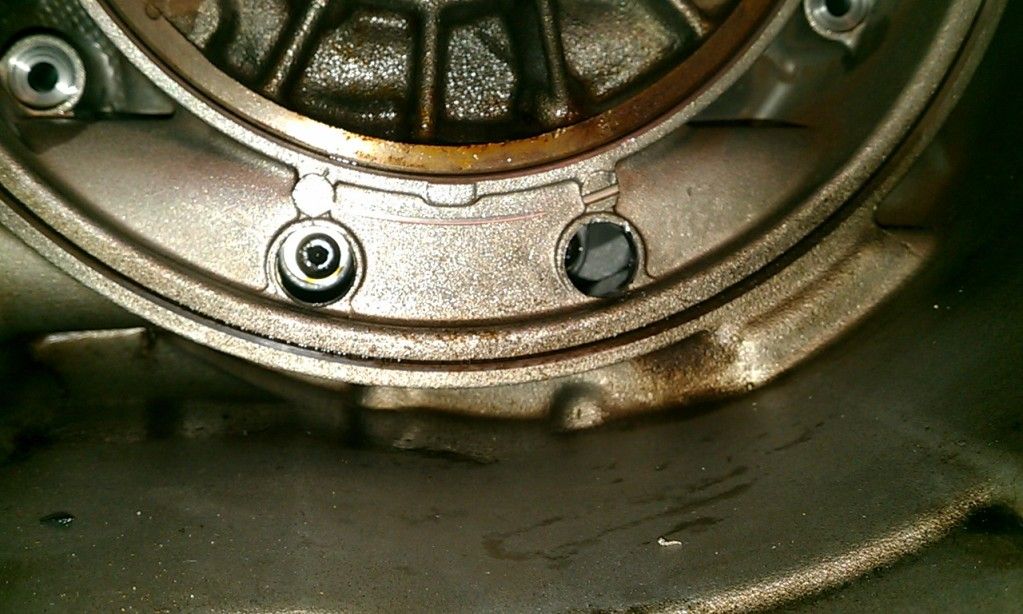 The large of the two splines are part of the intermediate plate and I'm fairly sure that the factory puller would use this to pull on and push against the central shaft. I don't have one! I wasn't sure if the oil lines that run above the valve body actually sat into the intermediate plate or not and didn't want to chance damaging anything so the sump plate etc came off next. 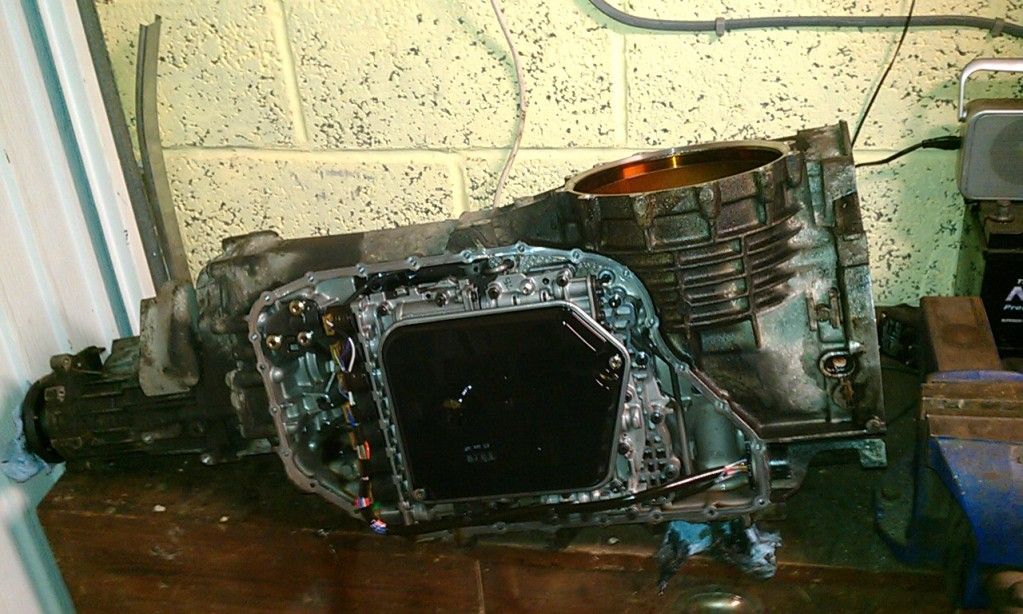 Valve body... Note that there are two sizes of bolts here. Some hold the lower sections of the valve body to the top sections and some hold the whole valve body onto the gearbox. The ones you want to remove have the bigger diameter heads. 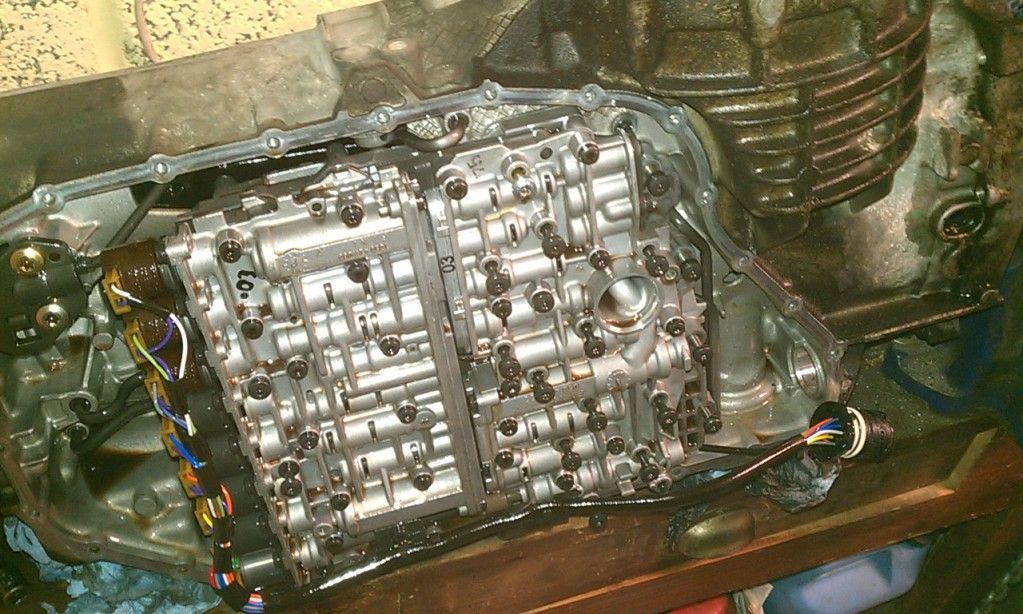 Wiring - this is held in place with a large circlip. 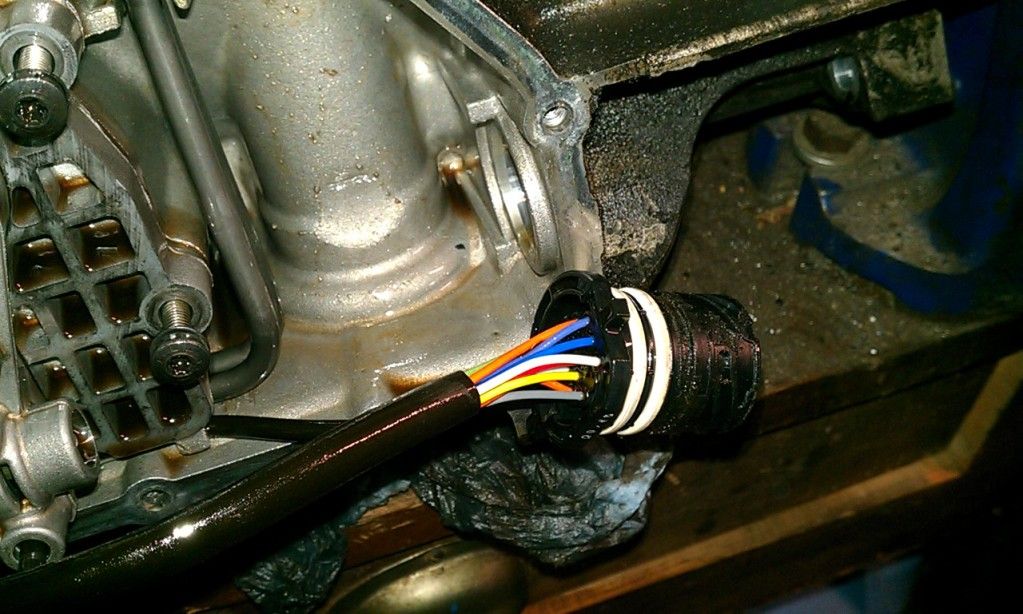 With this off (forgot to take a photo, sorry) it was obvious that the pipes didn't actually go into the intermediate plate but I was able to push on the back of the intermediate plate from underneath and this allowed me to remove it without a puller! 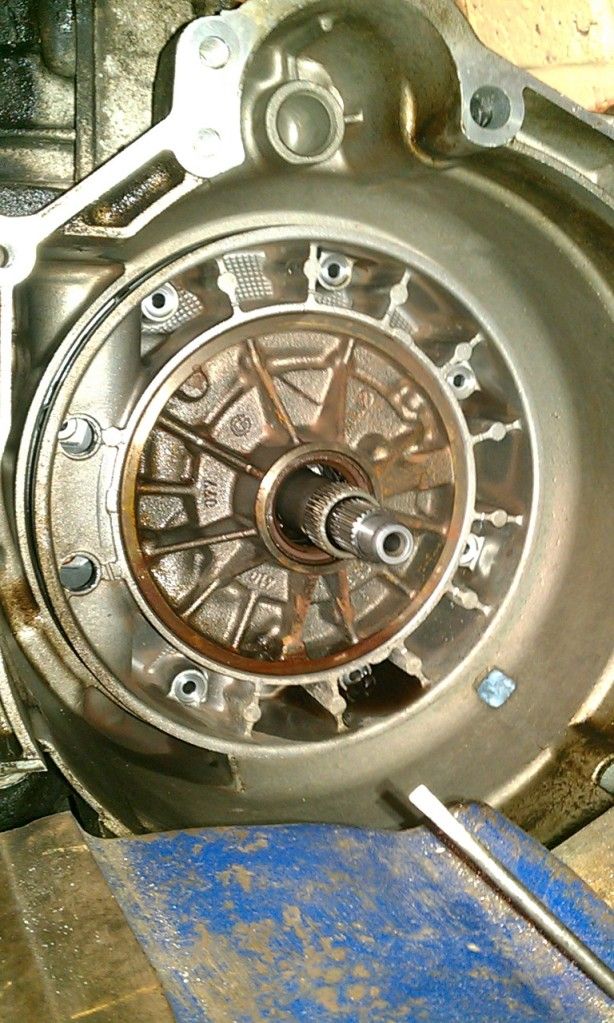 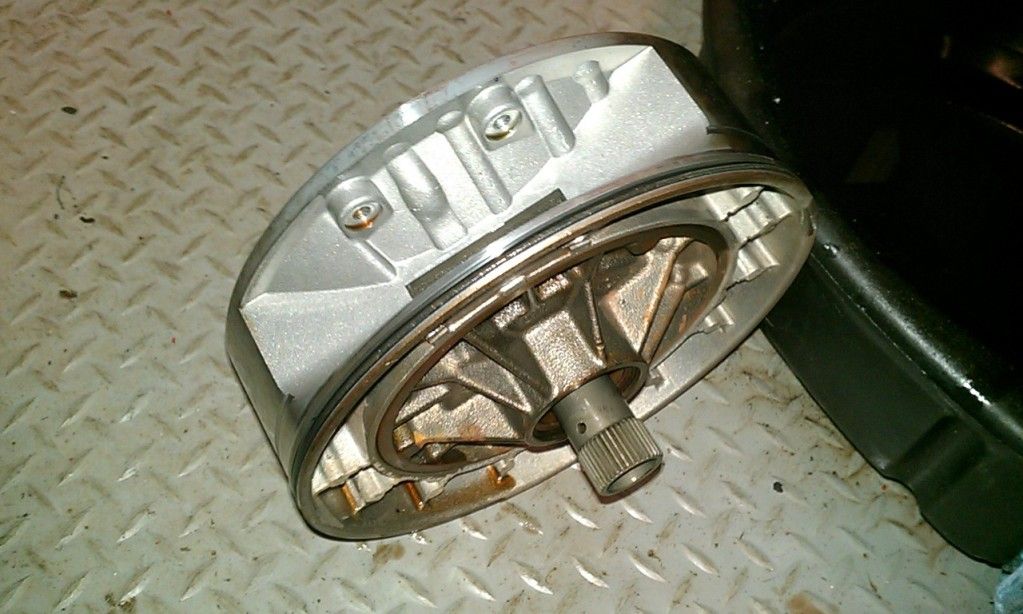 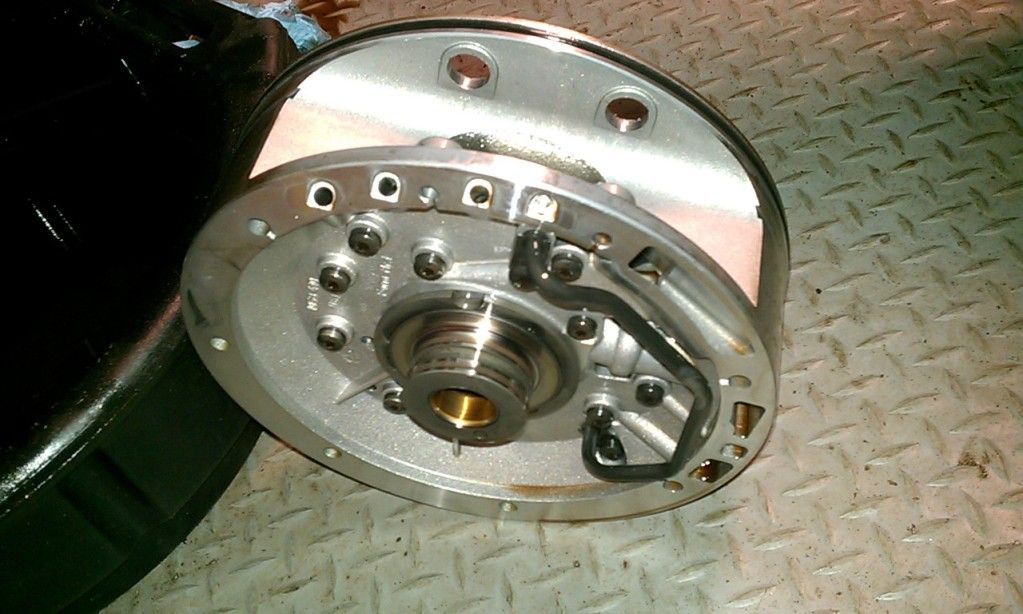 Onto the next parts... 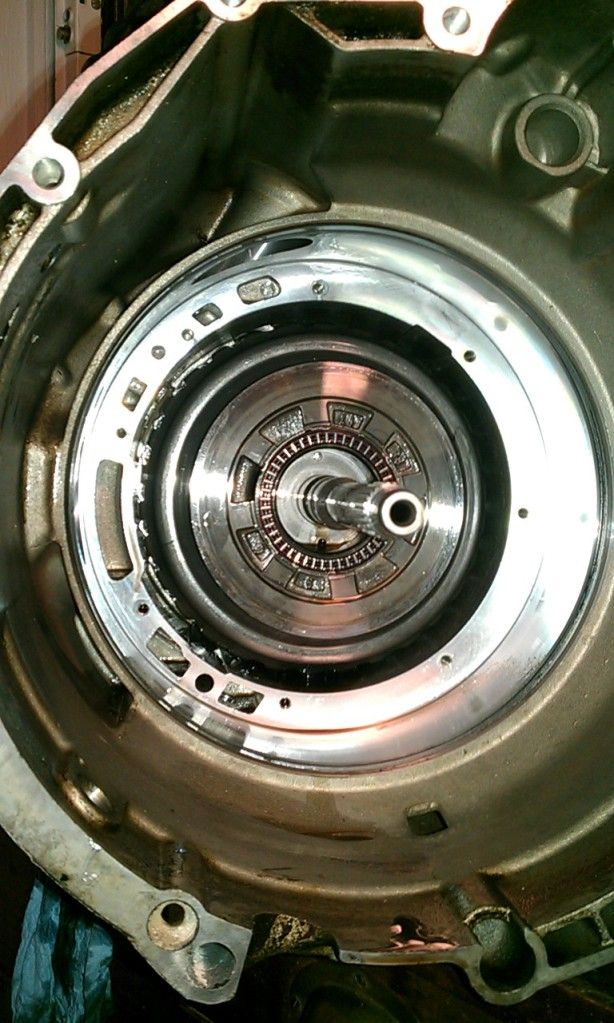 MG Last edited by SyncroS8; 7th April 2012 at 09:30 PM.
|
|
#6
7th April 2012, 09:16 PM
|
|||
|
|||
|
So we're into the trouble parts!
On reading up on the ZF 5HP24 gearbox (ours is the ZF 5HP24A), it's used in the BMW X5, BMW 840, 740, 540, Z8 Range Rover (the BMW one), lots of Jags and quite a few Audis! If you type in searches to Google, you'll find lots of them with gearbox problems. The ones which keep popping up are 'Clutch pack A' faults and 'Reverse gear' faults. The Clutch pack A controls 1st to 4th gears. The drum which holds the discs has a weakness where the circlip sits.  This is NOT a regular fault on Audis. The reverse gear fault is evident on Audis. The fault is due to a 'crumbling F clutch'. 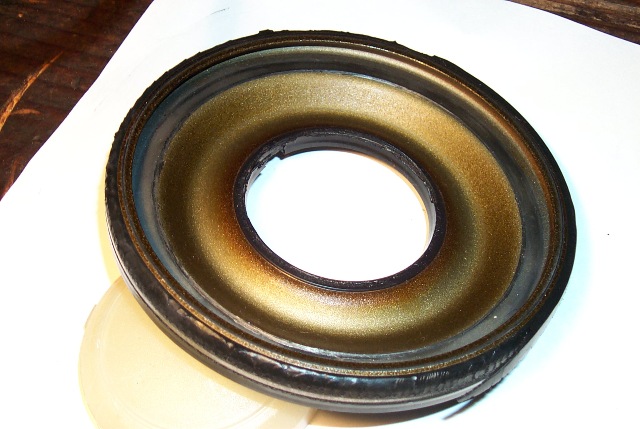 This F clutch is buried right at the back of the gearbox and goes in first when build it. Thankfully... my reverse gear works very well  I've only found this out through the internet. I think my wife thinks that I've losing my marbles spending so much time looking at gearbox parts  So out with the first section. 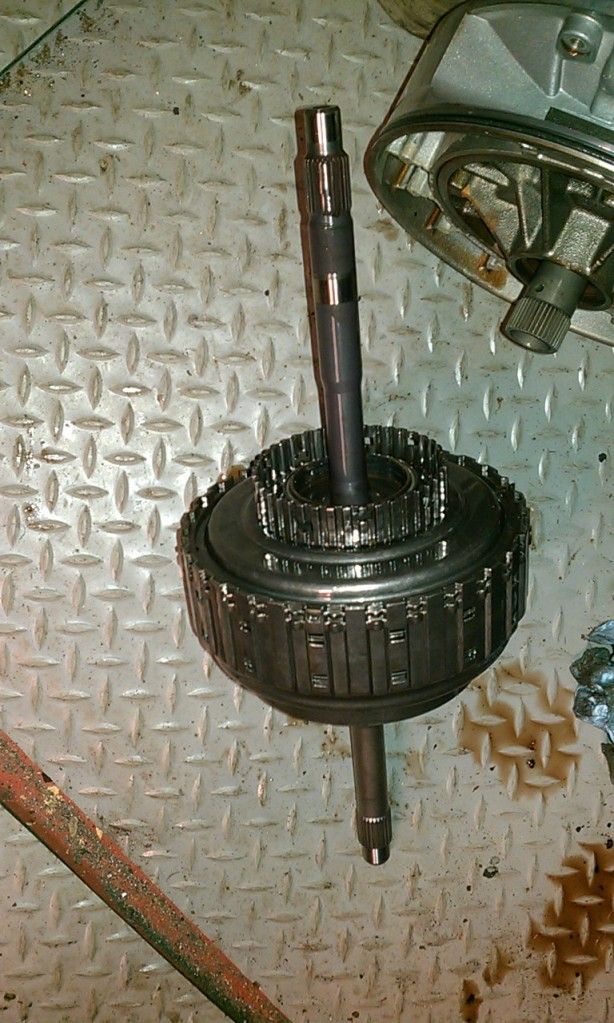 Remove the large circlip and everything is accessible. 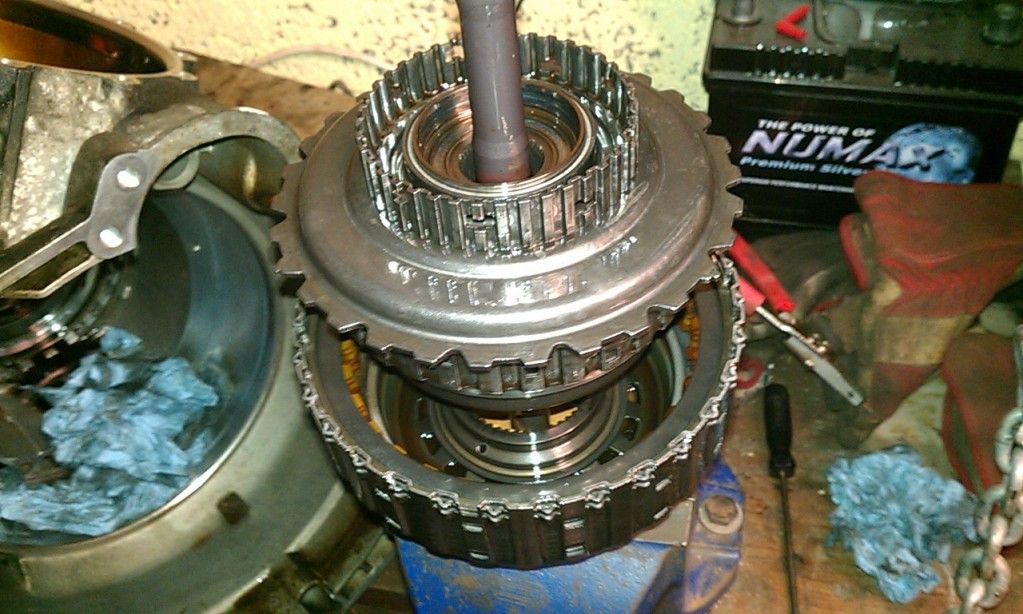 This is where inspection is key. You're looking for anything which is scored, has changed colour (blue tinge etc), O-rings, the hubs and discs. 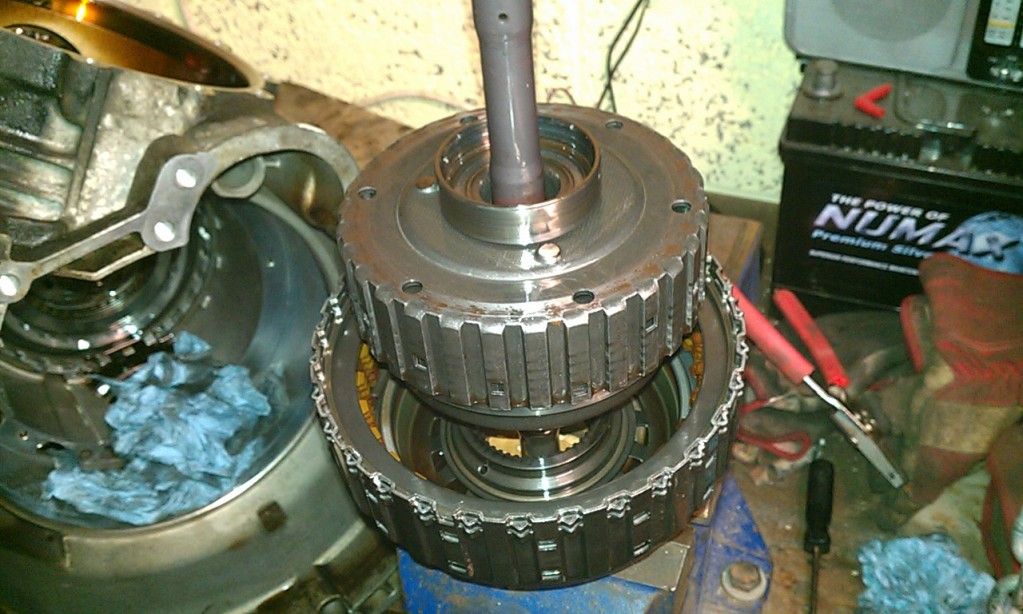 I took a lot of photos just so I know how everything goes back together. 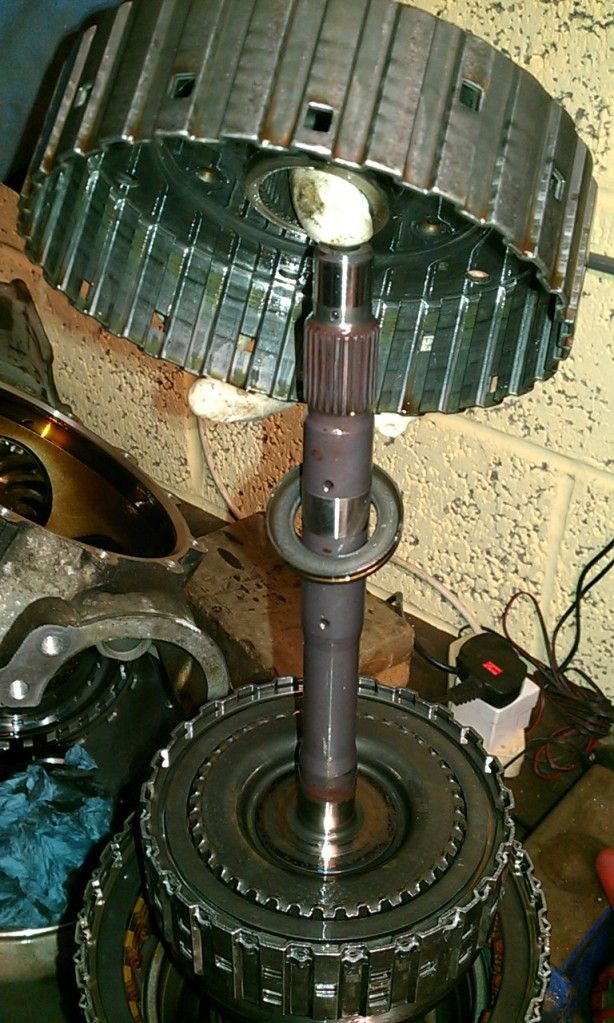 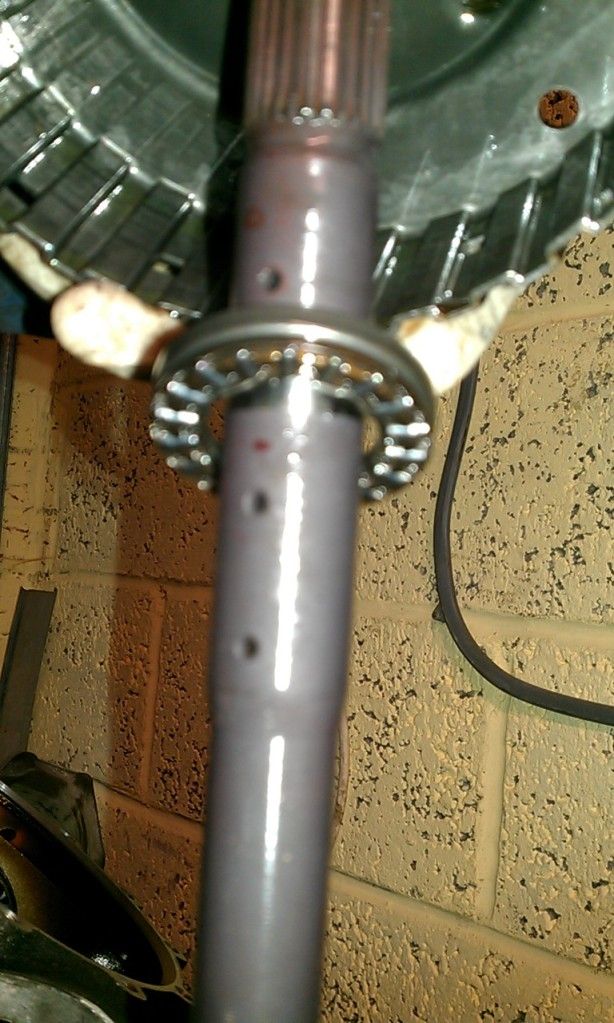 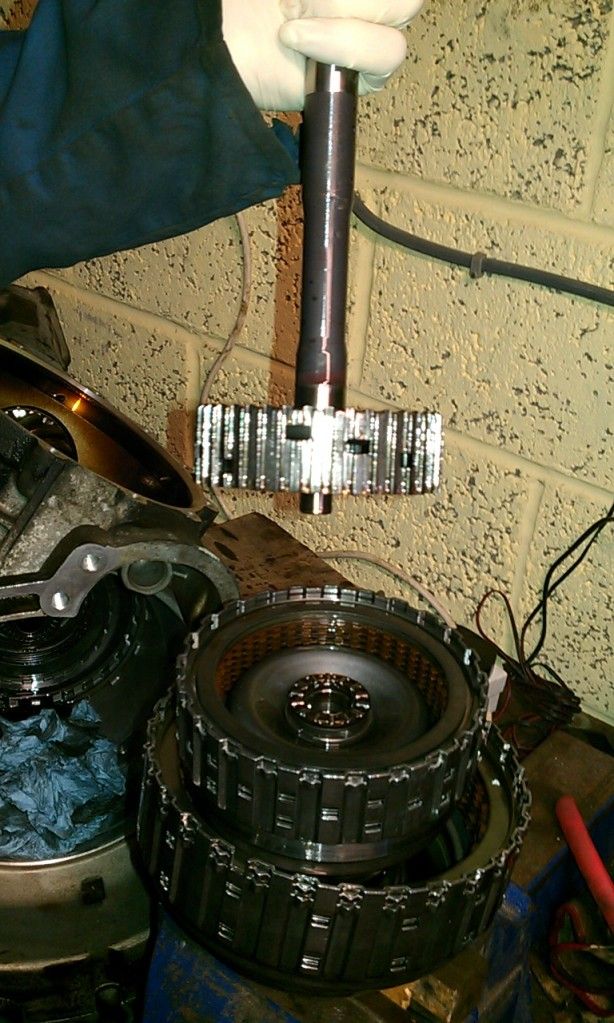 Clutch pack inspection time. 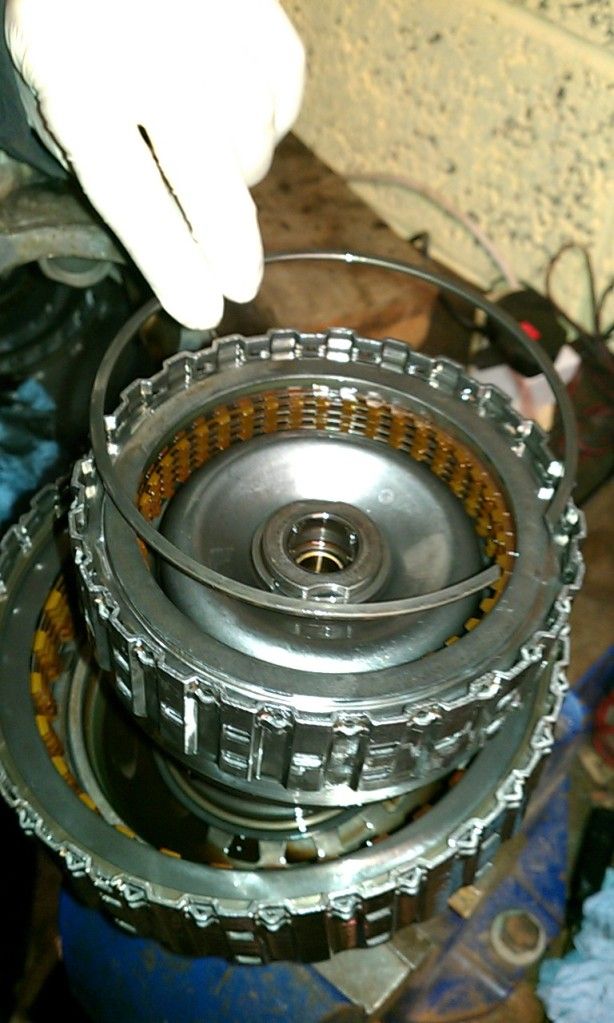 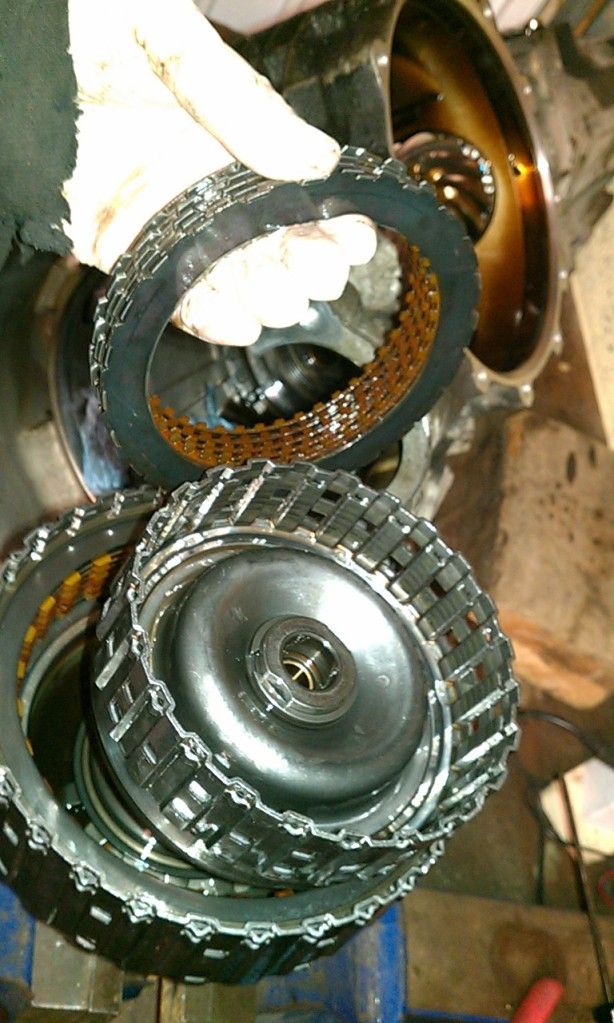 Then the culprit was found. 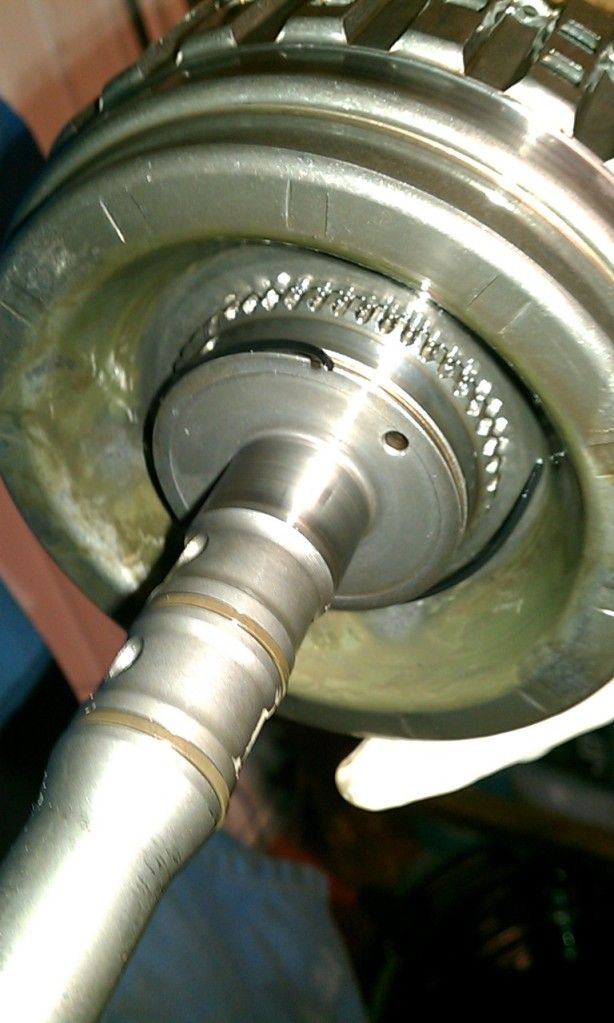 This one O-ring (well documented as failing on other ZF 5HP24 gearboxes) is the cause of all the problems. More inspections... 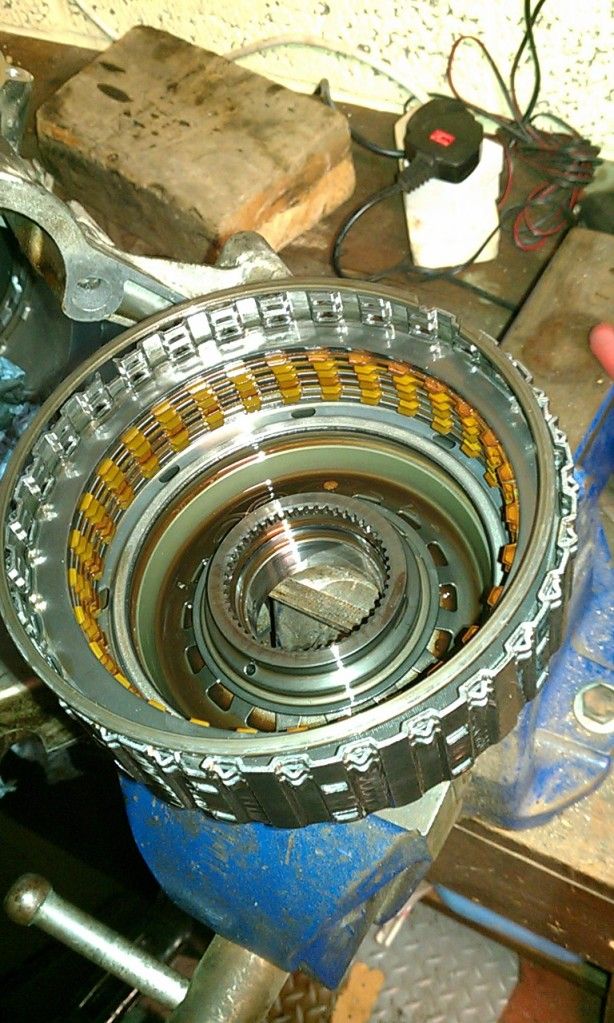 The bearing in the photo below... fits in there! 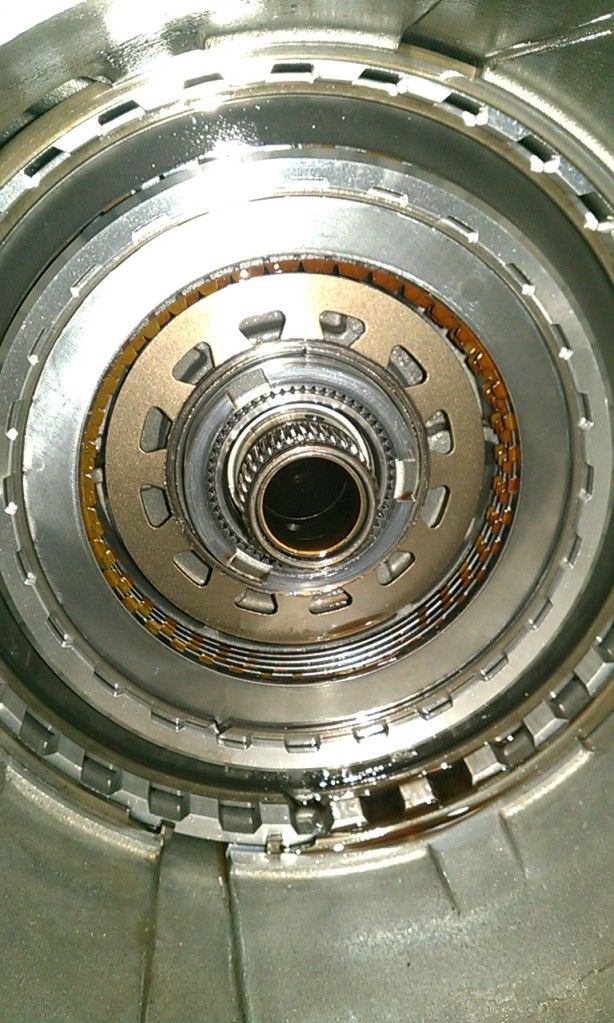 In fact it's dead. I managed to find all the rollers (fairly important inside a gearbox!) 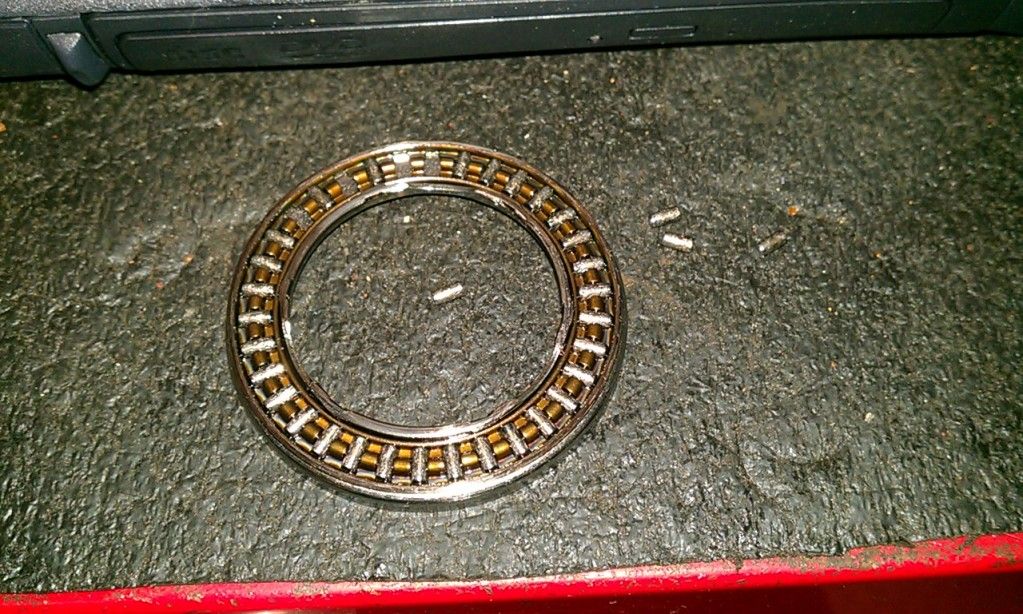 I would put this down to a lack of oil pressure but the gearbox has done 180K. Now the drum.. 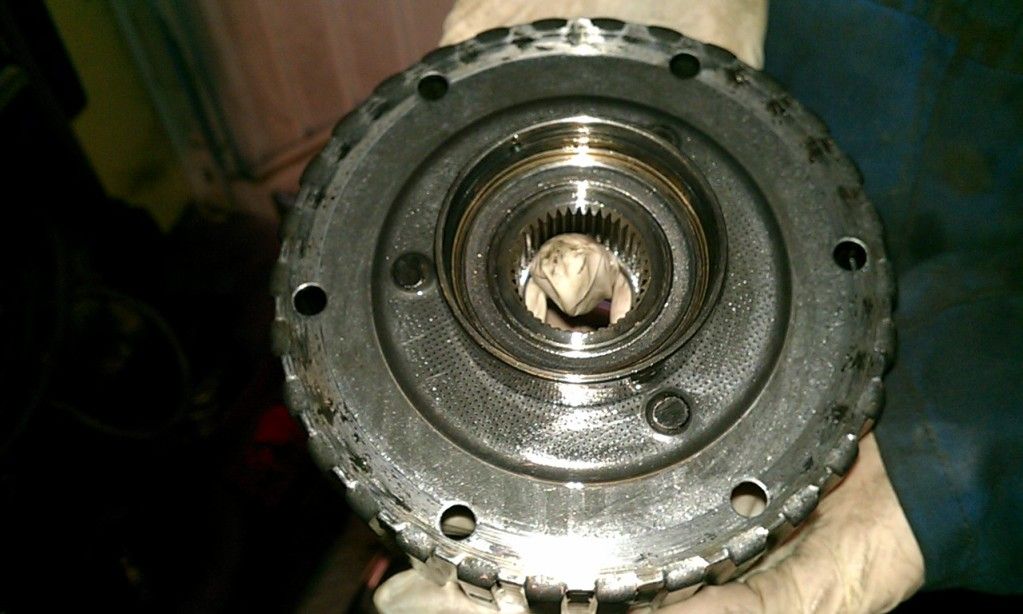 Score marks are evident. 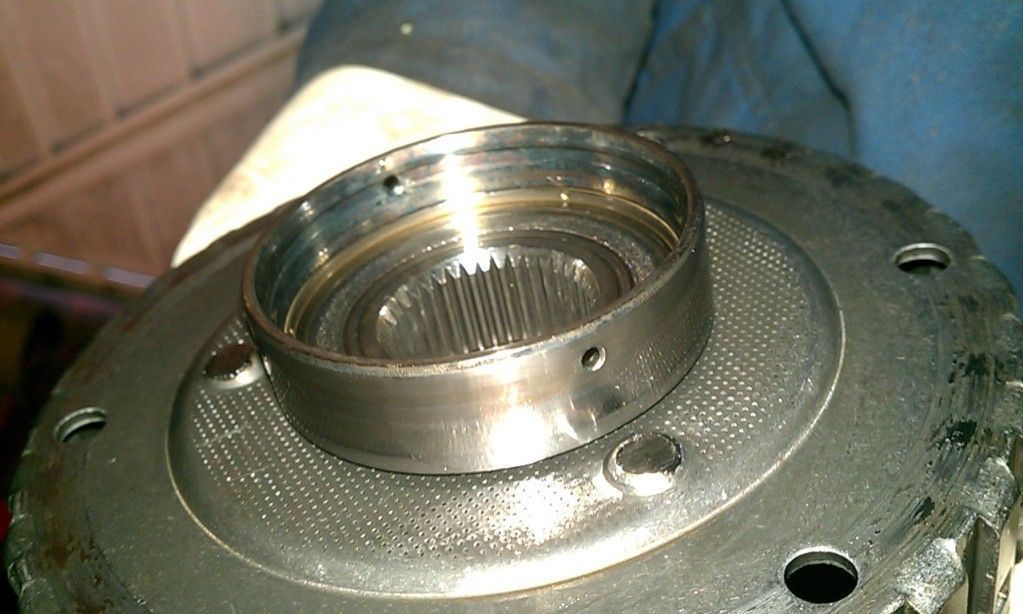 There has been a little bit of metal going through here. 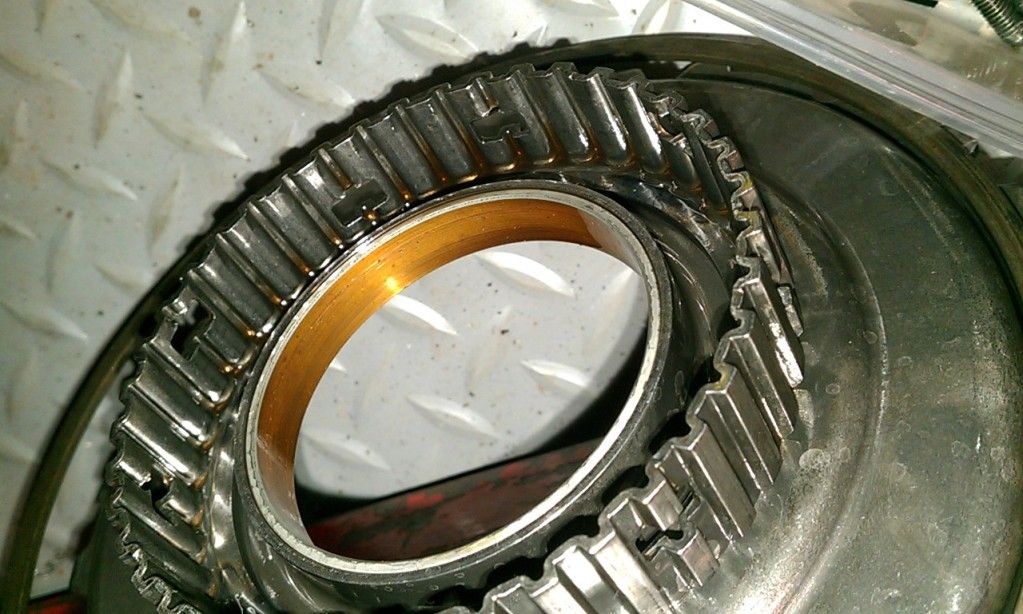 Ok, so we need an O-ring, a Drum, a bearing... Onto the next section. MG Last edited by SyncroS8; 7th April 2012 at 09:19 PM.
|
|
#7
7th April 2012, 09:25 PM
|
|||
|
|||
|
I wanted to go as far as I could to check for any other problems.
So I removed a couple of circlips which hold in a spring...which holds in some rubber seals onto the next housing. 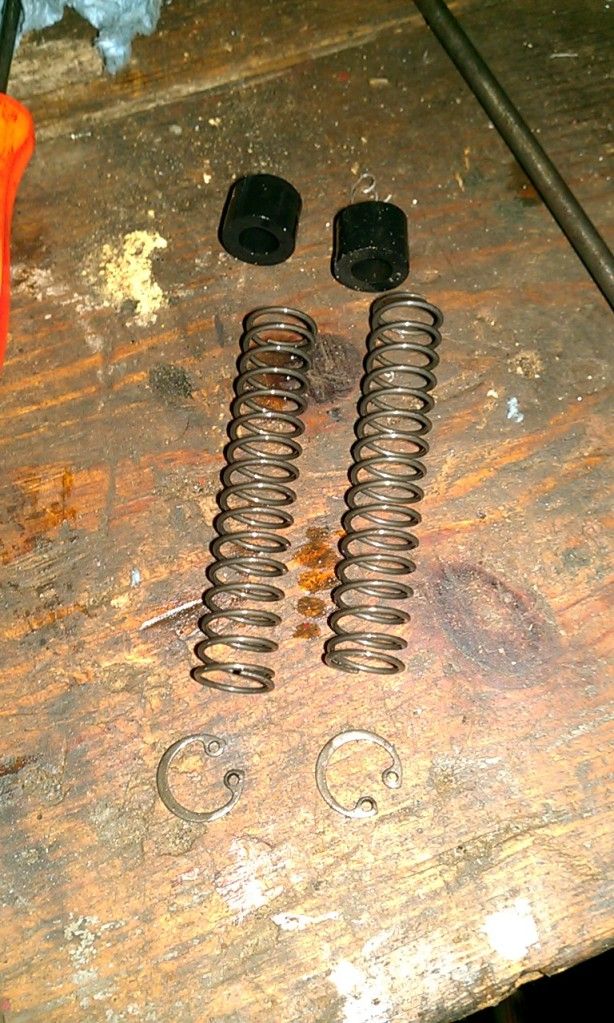 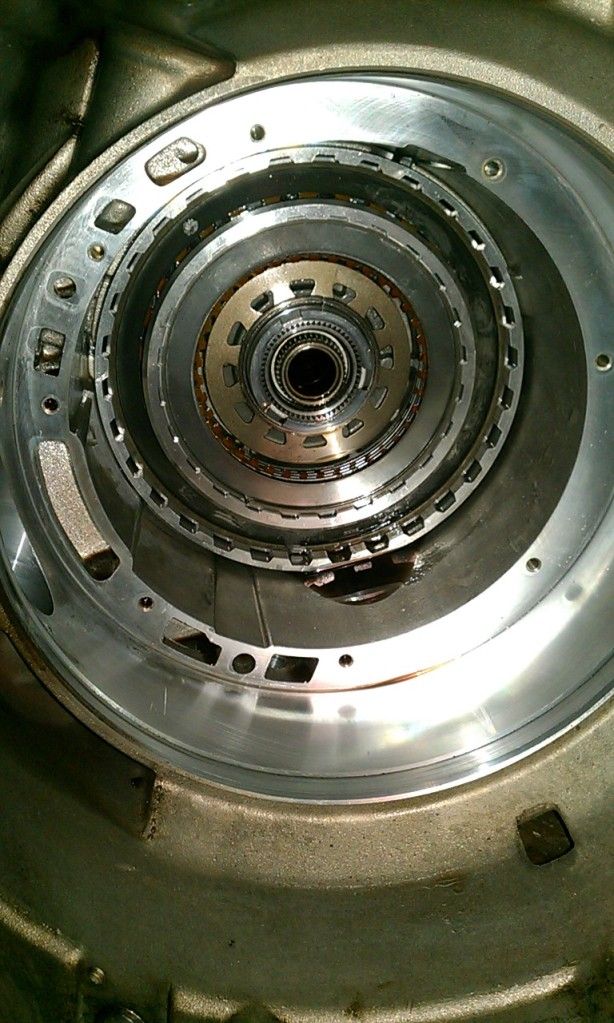 I managed to get the housing out. All looks good. 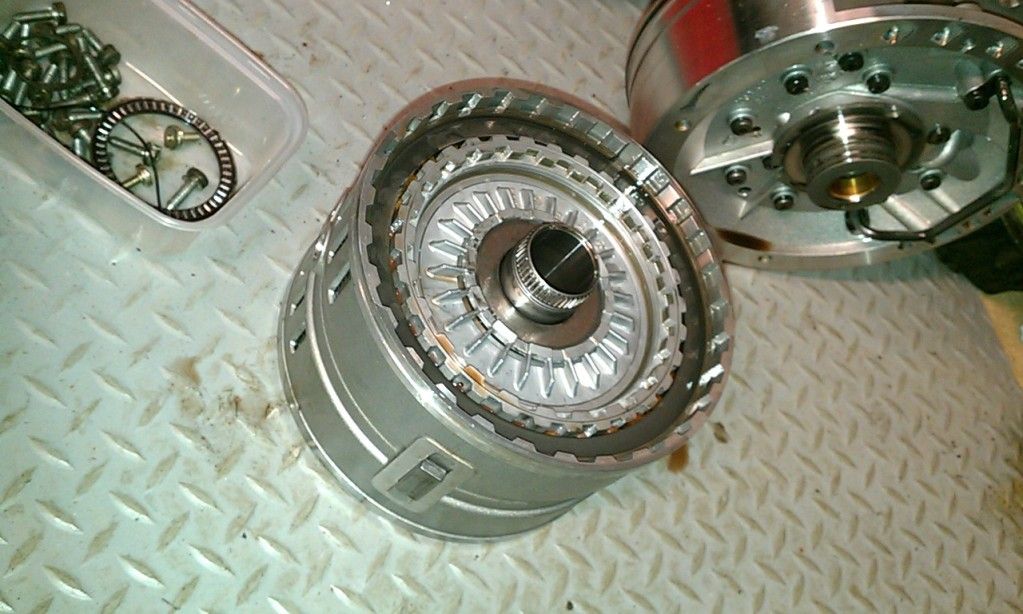 You have no idea how many clutch packs are inside this little lot! 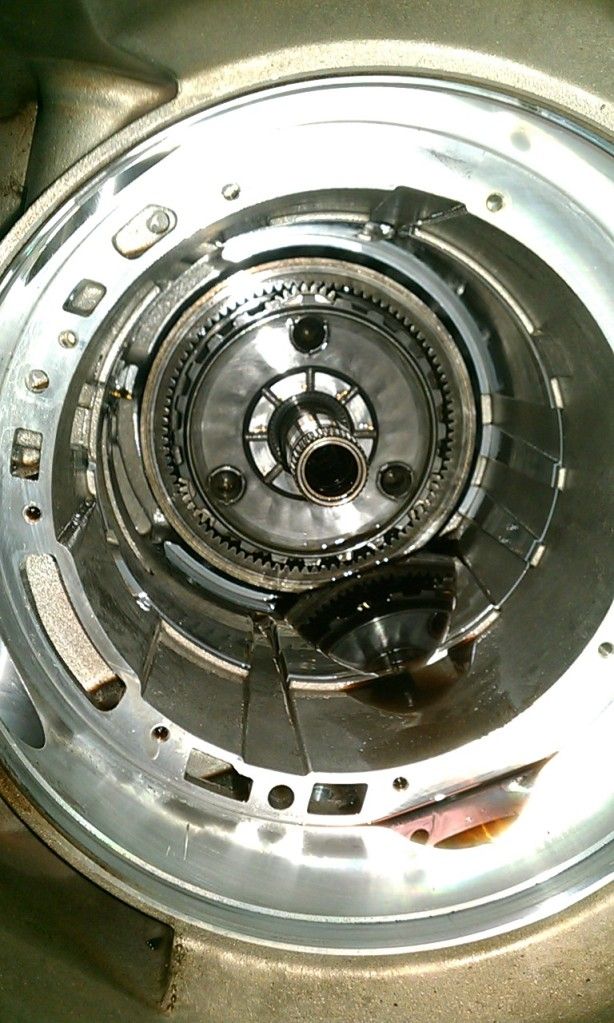 Epicyclic gears... I removed this heavy set of gears but couldn't pull the next section out and wasn't prepared to try too hard without pulling everything off the back of the gearbox (torsen housing etc) so it went back in. I didn't find any issues with the clutch packs or gears so put it back as it was and I'll just deal with the obvious issues. I'll be ordering parts from Chester Transmission on Tuesday. I hope that this has given you all some idea of what's inside one of these gearboxes and just what's involved in fixing one. I've seen two A8s on ebay over the last two days for around £500. Very tempting but I don't fancy doing this every day of the week! MG Last edited by SyncroS8; 7th April 2012 at 09:43 PM.
|
|
#8
8th April 2012, 08:52 AM
|
||||
|
||||
|
A massive task to take on, interesting to see the inside of these boxes.
There is a chap on a couple of Range Rover forums who seems to be a bit of an authority on these boxes, RRPhil is his user name and he's in Blackburn, I'm sure if you were stuck he would be able to help you with any questions you have, he is very approachable .
__________________
. Nite Blue 3.0L SE Quattro 
|
|
|
|


 Hybrid Mode
